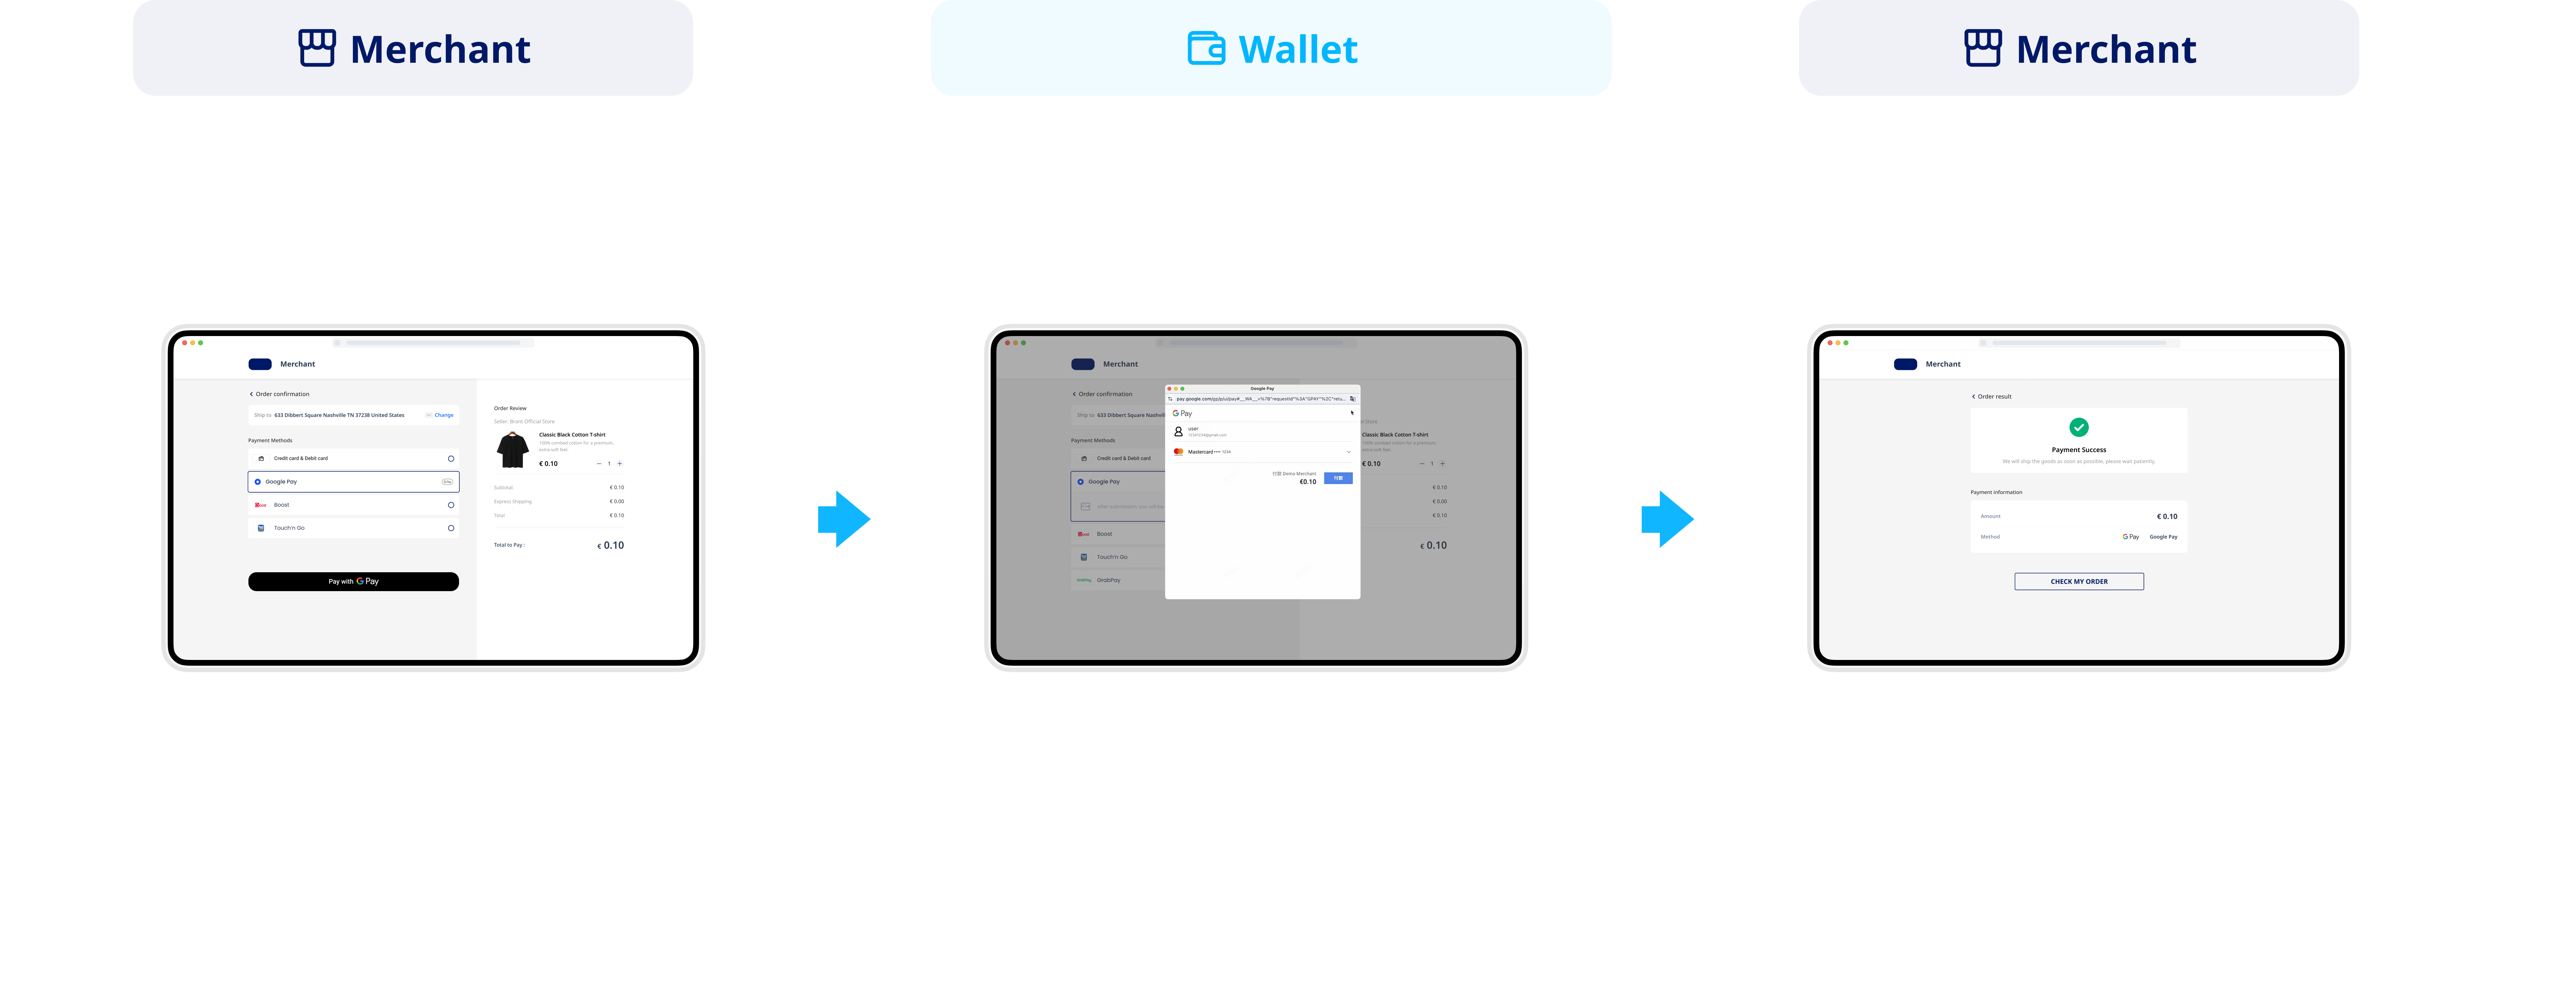
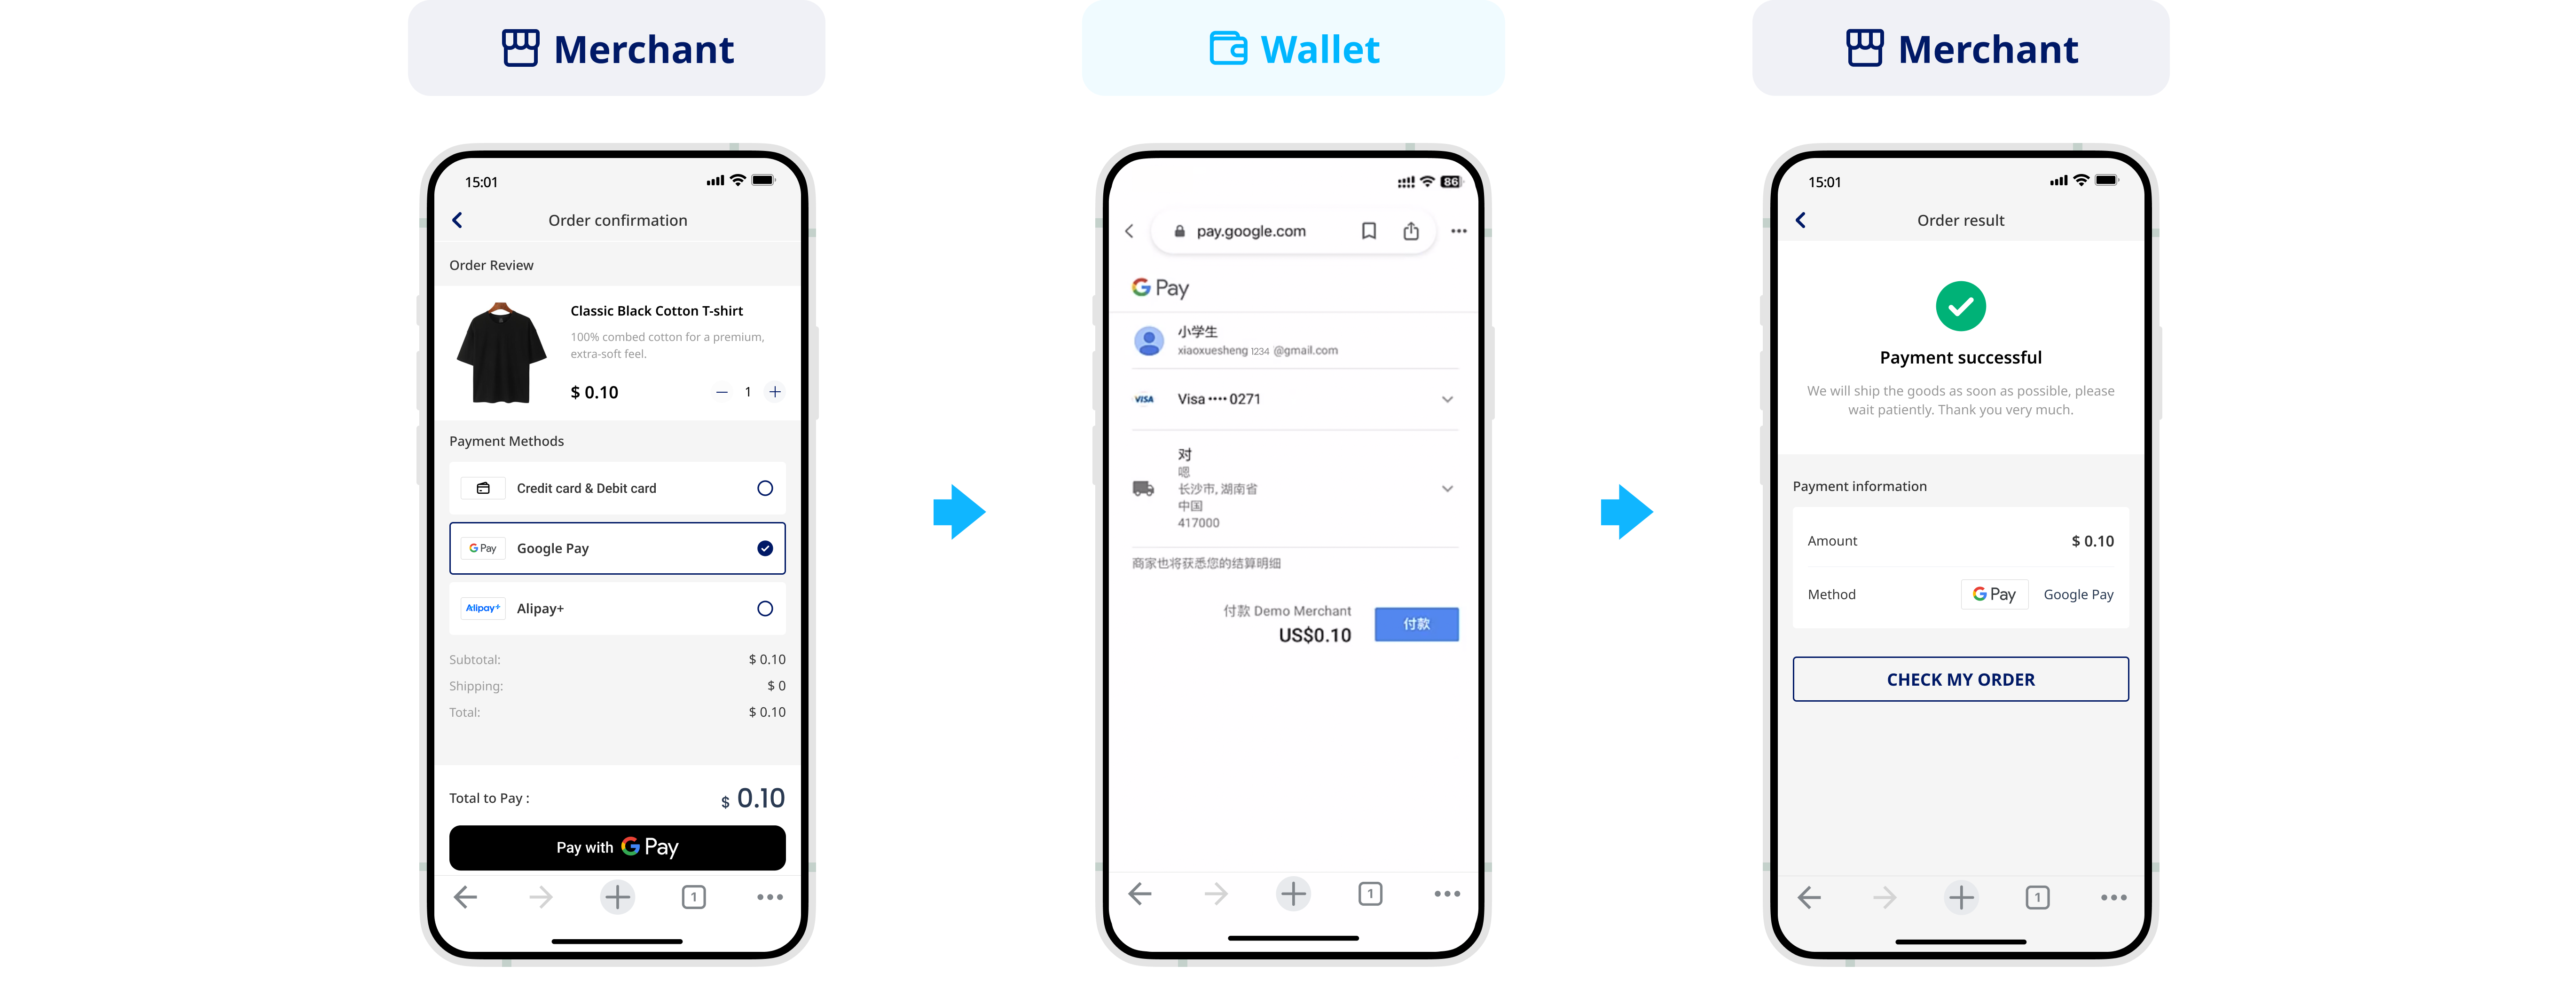
Accept payments with Google Pay
Through the Google Pay service, buyers can make payments using credit or debit cards stored in their Google accounts. With Antom Checkout Page (CKP), you do not need to integrate the Google Pay SDK separately. Checkout Page will automatically load Google Pay services for you and can be configured to support Google Pay as an express payment method.
User experience
Integration preparations
Before you start integrating, read the Integration Guide and API Overview documents to understand the integration steps of the server-side API and the precautions for calling the API. Furthermore, ensure that the following prerequisites are met:
- Obtain a client ID
- Complete the key configuration
- Complete the configuration of paymentNotifyUrl to receive the asynchronous notification
- Integrate the server-side SDK package, install the server-side library, and initialize a request instance. For more details, refer to Server-side SDKs.
Integration steps
Follow these steps to start the integration:
- Create a payment session
- Redirect to Antom Checkout Page
- Obtain the payment result
- Initiate capture
Step 1: Create a payment session
You can call the createPaymentSession (One-time Payments) API and pass in the order information to create a payment session and redirect to the Antom Checkout Page.
The key parameters of the request are as follows:
Parameter type | Parameter name | Required | Description |
| Base parameters | productCode | Yes | The value of this parameter in this scenario is fixed as CASHIER_PAYMENT. |
productScene | Yes | The value of this parameter in this scenario is fixed as CHECKOUT_PAYMENT. | |
paymentRequestId | Yes | The unique ID assigned by you to identify a payment request. | |
paymentAmount | Yes | The payment amount that you requests to receive in the order currency. | |
paymentRedirectUrl | Yes | The merchant page URL that the buyer is redirected to after the payment is completed. | |
paymentNotifyUrl | No | The URL that is used to receive the payment result notification. You can also set the URL to receive the result notification on Antom Dashboard. | |
settlementStrategy | No | The settlement strategy for the payment request. Specify the settlementCurrency parameter in the API if you signed up for multiple settlement currencies. | |
locale | No | Language tag specified for the Checkout Page. If this parameter is empty or set to automatic, the default language setting of the browser will be used, which is usually English. | |
paymentFactor.isAuthorization | No | Indicates whether the payment scenario requires authorization. Valid values are:
| |
| Order parameters | order.orderAmount | Yes | Order amount. |
order.referenceOrderId | Yes | Order ID. | |
order.orderDescription | Yes | Order description. | |
order.buyer | Yes | The buyer information of the merchant side. At least one of the following information must be provided:
| |
Google Pay preference parameters | availablePaymentMethod.paymentMethodMetaData.googlePayConfiguration | No | In the Checkout Page scenario, it is recommended to use the default value for this parameter.
|
| Specify Google Pay as an express payment method | availablePaymentMethod.paymentMethodTypeList.expressCheckout | No | You can specify Google Pay as an express payment method either by setting this parameter to |
The above parameters are the basic parameters for creating a payment session. For complete and additional requirements for specific payment methods, please refer to createPaymentSession (One-time Payments).
The following sample code shows how to call the createPaymentSession (One-time Payments) API:
  /**
     * show how to card payment Session(need to finish payment by Antom SDK)
     */
    public static void executePaymentSessionCreateWithGooglePay() {

        AlipayPaymentSessionRequest alipayPaymentSessionRequest = new AlipayPaymentSessionRequest();
        alipayPaymentSessionRequest.setProductCode(ProductCodeType.CASHIER_PAYMENT);
        alipayPaymentSessionRequest.setProductScene("CHECKOUT_PAYMENT");
        // replace with your paymentRequestId
        String paymentRequestId = UUID.randomUUID().toString();
        alipayPaymentSessionRequest.setPaymentRequestId(paymentRequestId);

        // set amount
        Amount amount = Amount.builder().value("4200").currency("SGD").build();
        alipayPaymentSessionRequest.setPaymentAmount(amount);

        // AvailablePaymentMethod
        AvailablePaymentMethod available = new AvailablePaymentMethod();
        List<PaymentMethodTypeItem> list = new ArrayList<>();
        PaymentMethodTypeItem item = new PaymentMethodTypeItem();
        item.setPaymentMethodType("GOOGLEPAY");
        item.setPaymentMethodOrder(0);
        item.setExpressCheckout(true);
        list.add(item);
        available.setPaymentMethodTypeList(list);
        alipayPaymentSessionRequest.setAvailablePaymentMethod(available);

        // replace with your orderId
        String orderId = UUID.randomUUID().toString();

        // set buyer info
        Buyer buyer = Buyer.builder().referenceBuyerId("yourBuyerId").build();

        // set order info
        Order order = Order.builder().referenceOrderId(orderId)
                .orderDescription("antom testing order").orderAmount(amount).buyer(buyer).build();
        alipayPaymentSessionRequest.setOrder(order);

        // replace with your notify url
        alipayPaymentSessionRequest.setPaymentNotifyUrl("http://www.yourNotifyUrl.com");

        // replace with your redirect url
        alipayPaymentSessionRequest.setPaymentRedirectUrl("http://www.yourRedirectUrl.com");

        // do payment
        AlipayPaymentSessionResponse alipayPaymentSessionResponse = null;
        try {
            alipayPaymentSessionResponse = CLIENT.execute(alipayPaymentSessionRequest);
            System.out.println(JSONObject.toJSON(alipayPaymentSessionResponse));
        } catch (AlipayApiException e) {
            String errorMsg = e.getMessage();
            // handle error condition
        }
    }
The following shows the sample code of a request:
{
  "order": {
    "buyer": {
      "referenceBuyerId": "yourBuyerId"
    },
    "goods": [
      {
        "goodsBrand": "Antom Brand",
        "goodsCategory": "outdoor goods/bag",
        "goodsImageUrl": "https://mdn.alipayobjects.com/portal_pdqp4x/afts/file/A*H8M9RrxlArAAAAAAAAAAAAAAAQAAAQ",
        "goodsName": "Classic Woman Bag",
        "goodsQuantity": "1",
        "goodsSkuName": "Black",
        "goodsUnitAmount": {
          "currency": "SGD",
          "value": "6000"
        },
        "goodsUrl": "https://yourGoodsUrl",
        "referenceGoodsId": "yourGoodsId"
      }
    ],
    "orderAmount": {
      "currency": "SGD",
      "value": "6000"
    },
    "orderDescription": "antom ckp testing order",
    "referenceOrderId": "c3df9b82-ff67-424b-880b-06c3615b46ea"
  },
  "paymentAmount": {
    "currency": "SGD",
    "value": "6000"
  },
  "availablePaymentMethod": {
    "paymentMethodTypeList": [
      {
        "paymentMethodType": "GOOGLEPAY",
        "expressCheckout": false,
        "paymentMethodOrder": 1
      }
    ]
  },
  "paymentNotifyUrl": "http://www.yourNotifyUrl.com/payment/receiveNotify",
  "paymentRedirectUrl": "http://localhost:8080/index.html?paymentRequestId=597795b7-c812-4132-bd7d-c55914eefdcb",
  "paymentRequestId": "597795b7-c812-4132-bd7d-c55914eefdcb",
  "productCode": "CASHIER_PAYMENT",
  "productScene": "CHECKOUT_PAYMENT"
}
The following shows the sample code of a response, which contains the following parameters:
- paymentSessionData: The encrypted payment session data. Pass the data to your front end.
- paymentSessionExpiryTime: The specific date and time after which the payment session will expire.
- normalUrl: The URL used to redirect to the Checkout Page.
{
    "normalUrl": "https://checkout.antom.com/checkout-page/pages/payment/index.html?sessionData=1iwX2rH5kXnUGT5372d0kHD7PwcgPmRSMgAsvKs8hqRkqobbtWbep59PU2eO5w72h%2B%2XXXX",
    "paymentSessionData": "1iwX2rH5kXnUGT5372d0kHD7PwcgPmRSMgAsvKs8hqRkqobbtWbep59PU2eO5w72h+/c278B+P+nDVNzrQySQQ==&&SG&&188&&eyJleHRlbmRJbmZvIjoie1wiT1BFTl9NVUxUSXXXX",
    "paymentSessionExpiryTime": "2025-03-19T16:21:06+08:00",
    "paymentSessionId": "1iwX2rH5kXnUGT5372d0kHD7PwcgPmRSMgAsvKs8hqSln4WiVZXXXX",
    "result": {
        "resultCode": "SUCCESS",
        "resultMessage": "success.",
        "resultStatus": "S"
    }
}
The table shows the possible values that the result.resultStatus parameter in the request message may return. Please handle the result according to the guidances:
result.resultStatus | Message | Further actions |
| Indicates that payment session creation succeeded. | Obtain the Antom Checkout Page URL (normalUrl) and return to the merchant's front end. For detailed steps, please refer to Step 2. |
| Indicates that payment session creation failed for unknown reasons. | Please use a new paymentRequestId and call the API again to resolve the issue. Please contact Antom technical support if the problem persists. |
| Indicates that the payment session creation failed. | Please check and verify whether the current API required request parameters (including header parameters and body parameters) are correctly passed and valid. |
Note: If you did not receive a response message, it might be due to a network timeout. Please use a new paymentRequestId and call the API again to resolve the issue.
Step 2: Redirect to Antom Checkout Page
After the merchant server obtains normalUrl and passes it to front end, it will redirect from the merchant front end to the Antom Checkout Page. For details, please refer to Hosted mode.
Step 3: Obtain the payment result
After the buyer completes payment or the payment times out, you can obtain the payment result either by receiving asynchronous notifications from Antom or by proactively querying the result. For detailed steps, refer to Process asynchronous notifications and Inquire payments.
Step 4: Capture
Antom provides both automatic and manual capture methods. You can choose based on your business needs. After initiating capture, you can obtain the result via asynchronous notification or active inquiry. For specific operations, refer to Capture.
After payments
After completing the payment, you can perform the following actions:
Refund
To learn about Antom refund rules and how to initiate a refund for a successful transaction, see Refund for more information.
Dispute
When a buyer chooses to pay with a card, a dispute may occur. To learn more, see Dispute.
Reconciliation
After the transaction is completed, use the financial reports provided by Antom for reconciliation. For more information on how to reconcile and the settlement rules of Antom, please refer to Reconciliation.
Additional content
Card payment features
Card payment features also apply to Google Pay. The following table outlines the support status of these features for Google Pay:
Type | Supported | Conditions |
Conditional |
| |
| Yes | None | |
| 3D Secure 2 | Yes |
|
| Antom 3DS Retry | Yes | None |
| MIT | Yes | None |
Specify a payment method
You can specify payment methods on Antom Dashboard through Payments > Checkout page > Payment methods. You can also pass the parameters in the createPaymentSession (One-time Payments) API to specify the display of payment methods on Checkout Page, the order of the payment method list, and the display of express payments.
Note: If you pass parameters through the API, the API values take priority.
This feature offers you the following benefits:
- Filter local payment methods based on your business region.
- Sort your preferred payment methods.
- Display the mainstream quick payments, such as Alipay, Apple Pay, and Google Pay.
To specify Google Pay as the only payment method, pass the following parameters in the availablePaymentMethod parameter of the createPaymentSession (One-time Payments) API:
The following is a sample code for specifying Google Pay as the only payment method:
{
  "availablePaymentMethod": {
    "paymentMethodTypeList": [
      {
        "paymentMethodType": "GOOGLEPAY",
        "expressCheckout": true,
        "paymentMethodOrder": "0"
      }
    ]
  }
}

