
Hosted mode
Antom Checkout Page (CKP) is a user-friendly, low-code payment solution that simplifies global transactions. Supporting a wide range of payment methods, CKP meets the needs of different markets and business scenarios. With minimal setup, you can quickly create a professional, feature-rich checkout page that offers buyers a smooth and convenient payment experience while significantly improving payment integration efficiency and driving business growth.
This guide shows you how to integrate CKP through an API, where your buyers are redirected to the Antom Checkout Page to make payment without the need for additional page configurations.
User experience
The image shows the user experience from the merchant's page to Antom Checkout Page in general scenarios:

The image shows the user experience for scenarios where certain payment methods redirect from the merchant's page to Antom Checkout Page, then to a third-party payment page:


Payment flow
The following process shows how to integrate the hosted CKP:

- The buyer places an order on the merchant side.
- Create a payment session request.
When the buyer places an order on the merchant side, you can call the createPaymentSession (One-time Payments) API to access the H5 URL of Antom Checkout Page. - Handle Antom Checkout Page URL.
The merchant front end loads the Antom Checkout Page URL. On this page, the buyer selects the payment method and completes the payment. After the payment is processed, the buyer is redirected to the Checkout Page's result page and then redirected to the merchant result page. Alternatively, you can configure on Antom Dashboard to redirect the buyer directly to the merchant result page. - Obtain payment results.
You can retrieve payment results through asynchronous notifications. Configure the paymentNotifyUrl parameter in the createPaymentSession (One-time Payments) API to specify the URL to receive asynchronous notifications. Antom sends an asynchronous notification through the notifyPayment API when a payment request succeeds or expires.
Note: For card payments, Apple Pay, and Google Pay, an authorized-capture model is used. Steps 1 to 4 only complete the authorization stage-where the buyer completes payment using a card and the funds are temporarily frozen. To transfer the funds to your account, you must complete the capture step. A successful capture result should be used as the basis for shipping goods.
- Obtain the capture result.
By default, Antom automatically handles fund capture on your behalf. You can also manually capture funds by calling the capture (One-time Payments) API. The capture result can be obtained through one of the following methods:
- Asynchronous notification: Specify paymentNotifyUrl in the createPaymentSession (One-time Payments) API or configure on Antom Dashboard to set the address for receiving asynchronous notifications. Upon capture completion, Antom will send you asynchronous notifications via the notifyCapture (One-time Payments) API.
- Synchronous inquiry: Call the inquiryPayment API to check the payment status.
Integration preparations
Before you start integrating, read the Integration Guide and API Overview documents to understand the integration steps of the server-side API and the precautions for calling the API. Furthermore, ensure that the following prerequisites are met:
- Obtain a client ID
- Complete the key configuration
- Complete the configuration of paymentNotifyUrl to receive the asynchronous notification
- Integrate the server-side SDK package, install the server-side library, and initialize a request instance. For more details, refer to Server-side SDKs.
Integration Steps
Follow these steps to start the integration:
- Create a payment session
- Redirect to Antom Checkout Page
- Process asynchronous notifications
- Obtain the capture result
Step 1: Create a payment session
Buyers can select a payment method provided by Antom when making payments. For payment method configurations, see Specify a payment method. When the buyer makes a payment, you need to collect key information, such as the payment request ID, order details, payment redirect URL, and payment notification URL. Call the createPaymentSession (One-time Payments) API to create a payment session and redirect to the Antom Checkout Page.
If your payment methods include card payments, buyer information from the merchant side must be provided in the payment session parameters. For details, please refer to Card payments.
Creating a payment session includes the following parameters:
Field type | Field name | Required | Description |
Basic parameters | productCode | Yes | The value of this field in this scenario is fixed as CASHIER_PAYMENT. |
productScene | Yes | The value of this field in this scenario is fixed as CHECKOUT_PAYMENT. | |
paymentRequestId | Yes | The unique ID assigned by a merchant to identify a payment request. | |
| paymentAmount | Yes | The payment amount that you requests to receive in the order currency. | |
paymentRedirectUrl | Yes | The merchant page URL that the buyer is redirected to after the payment is completed. | |
| paymentNotifyUrl | No | The URL that is used to receive the payment result notification. You can also set the URL to receive the result notification on Antom Dashboard. | |
| settlementStrategy | No | The settlement strategy for the payment request. Specify the settlementCurrency parameter in the API if you signed up for multiple settlement currencies. | |
locale | No | Language tag specified for the Checkout Page. If this field is empty or set to automatic, the default language setting of the browser will be used, which is usually English. | |
paymentFactor.captureMode | No | Indicates the method for capturing funds after the user authorizes the payment. Valid values are:
| |
Order parameters | order.goods | No | Goods information in the order. If you use this parameter to pass goods information in the API, you must specify the following parameters:
|
order.orderAmount | Yes | The order amount on the merchant side for the services or products provided to the buyer. This parameter is used to display the buyer’s consumption record or payment result page. It includes the following parameters:
| |
order.referenceOrderId | Yes | The unique ID to identify the order on the merchant side. | |
order.orderDescription | Yes | Summary description of the order on the merchant side. |
The above parameters are the basic parameters for creating a payment session. For complete and additional requirements for specific payment methods, please refer to createPaymentSession (One-time Payments).
The following sample code shows how to call the createPaymentSession (One-time Payments) API:
public static void createPaymentSession() {
    AlipayPaymentSessionRequest alipayPaymentSessionRequest = new AlipayPaymentSessionRequest();
    alipayPaymentSessionRequest.setProductCode(ProductCodeType.CASHIER_PAYMENT);
    alipayPaymentSessionRequest.setProductScene(ProductSceneConstants.CHECKOUT_PAYMENT);

    // replace with your paymentRequestId
    String paymentRequestId = UUID.randomUUID().toString();
    alipayPaymentSessionRequest.setPaymentRequestId(paymentRequestId);

    // replace with your orderId
    String orderId = UUID.randomUUID().toString();

    // set buyer info
    Buyer buyer = Buyer.builder().referenceBuyerId("yourBuyerId").build();

    // convert amount unit(in practice, amount should be calculated on your serverside)
    // For details, please refer to: <a href="https://docs.antom.com/ac/ref/cc">Usage rules of the Amount object</a>
    Amount goodAmount = Amount.builder().currency("SGD").value("3000").build();

    // set goods info
    // note that goods.referenceGoodsId, good.referenceGoodsId, and goods.goodsName are required
    Goods goods = Goods.builder().goodsBrand("Antom Brand").goodsCategory("outdoor goods/bag").goodsName("Classic Woman Bag").goodsQuantity("2")
            .goodsSkuName("Black").goodsImageUrl("https://mdn.alipayobjects.com/portal_pdqp4x/afts/file/A*H8M9RrxlArAAAAAAAAAAAAAAAQAAAQ")
            .goodsUnitAmount(goodAmount).goodsUrl("https://yourGoodsUrl").referenceGoodsId("yourGoodsId").build();

    // set amount
    // amount.value equals goodsAmount.value * goods.goodsQuantity
    // for the currencies supported by payment methods, please refer to: <a href="https://docs.antom.com/ac/pm/supported_pm">Supported payment methods</a>
    Amount amount = Amount.builder().currency("SGD").value("6000").build();
    alipayPaymentSessionRequest.setPaymentAmount(amount);

    // set order info
    // note that order.orderAmount, order.referenceOrderId, and order.orderDescription are required
    Order order = Order.builder().referenceOrderId(orderId)
            .orderDescription("antom ckp testing order").orderAmount(amount).buyer(buyer).goods(Stream.of(goods).collect(Collectors.toList())).build();
    alipayPaymentSessionRequest.setOrder(order);

    // replace with your notify url
    // or configure your notify url here: <a href="https://dashboard.antom.com/global-payments/developers/iNotify">Notification URL</a>
    alipayPaymentSessionRequest.setPaymentNotifyUrl("http://www.yourNotifyUrl.com/payment/receiveNotify");
    // replace with your redirect url
    alipayPaymentSessionRequest.setPaymentRedirectUrl(
            "http://localhost:8080/index.html?paymentRequestId=" + paymentRequestId);

    AlipayPaymentSessionResponse alipayPaymentSessionResponse;
    try {
        System.out.println(JSON.toJSONString(alipayPaymentSessionRequest));
        alipayPaymentSessionResponse = CLIENT.execute(alipayPaymentSessionRequest);
    } catch (AlipayApiException e) {
        String errorMsg = e.getMessage();
        // handle error condition
    }
}
The following shows the sample code of a request:
{
  "order": {
    "buyer": {
      "referenceBuyerId": "yourBuyerId"
    },
    "goods": [
      {
        "goodsBrand": "Antom Brand",
        "goodsCategory": "outdoor goods/bag",
        "goodsImageUrl": "https://mdn.alipayobjects.com/portal_pdqp4x/afts/file/A*H8M9RrxlArAAAAAAAAAAAAAAAQAAAQ",
        "goodsName": "Classic Woman Bag",
        "goodsQuantity": "1",
        "goodsSkuName": "Black",
        "goodsUnitAmount": {
          "currency": "SGD",
          "value": "6000"
        },
        "goodsUrl": "https://yourGoodsUrl",
        "referenceGoodsId": "yourGoodsId"
      }
    ],
    "orderAmount": {
      "currency": "SGD",
      "value": "6000"
    },
    "orderDescription": "antom ckp testing order",
    "referenceOrderId": "c3df9b82-ff67-424b-880b-06c3615b46ea"
  },
  "paymentAmount": {
    "currency": "SGD",
    "value": "6000"
  },
  "paymentNotifyUrl": "http://www.yourNotifyUrl.com/payment/receiveNotify",
  "paymentRedirectUrl": "http://localhost:8080/index.html?paymentRequestId=597795b7-c812-4132-bd7d-c55914eefdcb",
  "paymentRequestId": "597795b7-c812-4132-bd7d-c55914eefdcb",
  "productCode": "CASHIER_PAYMENT",
  "productScene": "CHECKOUT_PAYMENT"
}
The following shows the sample code of a response, which contains the following parameters:
- paymentSessionData: The encrypted payment session data. Pass the data to your front end.
- paymentSessionExpiryTime: The specific date and time after which the payment session will expire.
- normalUrl: The URL used to redirect to the Checkout Page.
{
    "normalUrl": "https://checkout.antom.com/checkout-page/pages/payment/index.html?sessionData=1iwX2rH5kXnUGT5372d0kHD7PwcgPmRSMgAsvKs8hqRkqobbtWbep59PU2eO5w72h%2B%2XXXX",
    "paymentSessionData": "1iwX2rH5kXnUGT5372d0kHD7PwcgPmRSMgAsvKs8hqRkqobbtWbep59PU2eO5w72h+/c278B+P+nDVNzrQySQQ==&&SG&&188&&eyJleHRlbmRJbmZvIjoie1wiT1BFTl9NVUxUSXXXX",
    "paymentSessionExpiryTime": "2025-03-19T16:21:06+08:00",
    "paymentSessionId": "1iwX2rH5kXnUGT5372d0kHD7PwcgPmRSMgAsvKs8hqSln4WiVZXXXX",
    "result": {
        "resultCode": "SUCCESS",
        "resultMessage": "success.",
        "resultStatus": "S"
    }
}
The table shows the possible values that the result.resultStatus field in the request message may return. Please handle the result according to the guidances:
| result.resultStatus | Message | Further actions |
S | Indicates that payment session creation succeeded. | Obtain the Antom Checkout Page URL (normalUrl) and return to the merchant's front end. For detailed steps, please refer to Step 2. |
U | Indicates that payment session creation failed for unknown reasons. |
Please change the paymentRequestId and call the API again to resolve the issue. Please contact Antom technical support if the problem persists. |
F | Indicates that the payment session creation failed. | Please check and verify whether the current API required request fields (including header fields and body fields) are correctly passed and valid.
|
Note: If you did not receive a response message, it might be due to a network timeout. Please change the paymentRequestId and call the API again to resolve the issue.
Step 2: Redirect to Antom Checkout Page
After the merchant server obtains normalUrl and passes it to front end, it will redirect from the merchant front end to the Antom Checkout Page.
After obtaining the normalUrl, you need to redirect the page to Antom Checkout Page in the browser, or open it in a new tab.
if (serverResponse.normalUrl != null) {
    window.open(serverResponse.normalUrl, '_blank');
}The image below shows the rendering result of the redirected Antom Checkout Page:

Step 3: Process asynchronous notifications
1. Set the webhook URL to receive notifications
You can choose one of following two methods to set the webhook URL to receive notifications:
- If each of your orders has a unique notification URL, we recommend to set the webhook URL in each individual request. You can pass the asynchronous notification receiving URL for the specific order through the paymentNotifyUrl field in the createPaymentSession (One-time Payments) API.
- If all your orders share a unified notification URL, you can set the webhook URL on Antom Dashboard through Developer > Notification Address. For detailed steps, refer to Notification URL.
When a payment succeeds or fails, Antom sends an asynchronous notification (notifyPayment) to the address that you specified in the createPaymentSession (One-time Payments) API via the paymentNotifyUrl parameter. After receiving the notifications from Antom, you need to return response according to Return a receipt acknowledgement message.
Antom allows you to specify the URL in the createPaymentSession (One-time Payments) API via the paymentNotifyUrl parameter. If the address of each payment is the same, you can also configure the address on Antom Dashboard.
The following is the notification request sample code:
- paymentRequestId: indicats the payment request ID for consult, cancellation, and reconciliation.
- paymentId: indicates the payment ID aligned by Antom for refunds and reconciliation.
- paymentAmount: indicates the payment amount.
- paymentMethodType: indicates the payment method used by the buyer.
{
  "actualPaymentAmount": {
    "currency": "KRW",
    "value": "100"
  },
  "notifyType": "PAYMENT_RESULT",
  "paymentAmount": {
    "currency": "KRW",
    "value": "100"
  },
  "paymentCreateTime": "2024-04-19T01:10:49-07:00",
  "paymentId": "20240419194010800100188350218317930",
  "paymentRequestId": "amsdmpay_yuqian_fyf_0b3bd5e9-14bd-4cea-b288-091d9c6862ed",
  "paymentResultInfo": {},
  "paymentTime": "2024-04-19T01:12:14-07:00",
  "pspCustomerInfo": {
    "pspCustomerId": "a070c0d1b89af442c6aa01886f0183de812a5d3d4fe15c771145b2b844a9dd67",
    "pspName": "TOSSPAY"
  },
  "paymentMethodType": "TOSSPAY",
  "result": {
    "resultCode": "SUCCESS",
    "resultMessage": "success.",
    "resultStatus": "S"
  }
}
The table shows the possible values that the result.resultStatus field in the request message may return. Please handle the result according to the guidances:
result.resultStatus | Message | Further actions |
| Indicates that the payment is successful. | You can advance the order status. |
| Indicates that the payment failed. | Please guide the buyer to place a new order. |
Common questions
Q: When will the notification be sent?
A: The sending time of asynchronous notifications varies in different scenarios.
- If the payment is successfully completed, Antom will usually send you an asynchronous notification within 3 to 5 seconds. For some payment methods like cash payment, the notification might take a bit longer.
- If the buyer does not submit a payment, when the payment session times out, Antom does not send an asynchronous notification.
- If the buyer submits a payment but the final payment is not completed:
- When the last order is closed, if the payment session is still valid, Antom will send asynchronous notifications when the payment session expires.
- When the last order is closed, if the payment session expired, Antom will send an asynchronous notification when the last order is closed.
Note: The default payment session expiry time is 1 hour. The time it takes to close an order varies for different payment methods, the default is 14 minutes.
Q: Will the asynchronous notification be re-sent?
A: Yes, the asynchronous notification will be re-sent automatically within 24 hours for the following cases:
- If you didn't receive the asynchronous notification due to network reasons.
- If you receive an asynchronous notification from Antom, but you didn't make a response to the notification in the Sample code format.
The notification can be resent up to 8 times or until a correct response is received to terminate delivery. The sending intervals are as follows: 0 minutes, 2 minutes, 10 minutes, 10 minutes, 1 hour, 2 hours, 6 hours, and 15 hours.
Q: What are the key parameters in the notification that I need to use?
A: Pay attention to the following key parameters:
- result: indicates the payment result of the order.
- paymentRequestId: indicates the payment request number you generated for consult, cancel, and reconciliation.
- paymentId: indicates the payment order number generated by Antom, used for refund and reconciliation.
- paymentAmount: indicates the payment amount.
- paymentMethodTpye: indicates the payment method type that is included in payment method options.
Q: There are two types of asynchronous notifications. Which one should be used as the basis for shipment?
A: When you receives a
PAYMENT_RESULTnotifyType notification, you should first check whether the paymentMethodType isCARD. If it is notCARD, you can decide whether to proceed with shipment based on the result of this notification. If it isCARD, you need to wait for a notification ofCAPTURE_RESULTtype before making the decision to ship.
2. Verify asynchronous notifications
If you receive an asynchronous notification from Antom, you are required to return the response in the Sample code format, but you do not need to countersign the response.
You need to verify the signature of the payment notification sent by Antom.
/**
 * receive notify
 *
 * @param request    request
 * @param notifyBody notify body
 * @return Result
 */
@PostMapping("/receiveNotify")
@ResponseBody
public Result receiveNotify(HttpServletRequest request, @RequestBody String notifyBody) {
    // retrieve the required parameters from http request
    String requestUri = request.getRequestURI();
    String requestMethod = request.getMethod();

    // retrieve the required parameters from request header
    String requestTime = request.getHeader("request-time");
    String clientId = request.getHeader("client-id");
    String signature = request.getHeader("signature");

    try {
        // verify the signature of notification
        boolean verifyResult = WebhookTool.checkSignature(requestUri, requestMethod, clientId,
                                                          requestTime, signature, notifyBody, ANTOM_PUBLIC_KEY);
        if (!verifyResult) {
            throw new RuntimeException("Invalid notify signature");
        }

        // deserialize the notification body
        JSONObject jsonObject = JSON.parseObject(notifyBody);
        String notifyType = (String)jsonObject.get("notifyType");
        if("PAYMENT_RESULT".equals(notifyType)){
            AlipayPayResultNotify paymentNotify = jsonObject.toJavaObject(AlipayPayResultNotify.class);
            if (paymentNotify != null && "SUCCESS".equals(paymentNotify.getResult().getResultCode())) {
                // handle your own business logic.
                // e.g. The relationship between payment information and users is kept in the database.
                System.out.println("receive payment notify: " + JSON.toJSONString(paymentNotify));
                return Result.builder().resultCode("SUCCESS").resultMessage("success.").resultStatus(ResultStatusType.S).build();
            }
        }else if("CAPTURE_RESULT".equals(notifyType)){
            AlipayCaptureResultNotify captureNotify = jsonObject.toJavaObject(AlipayCaptureResultNotify.class);
            if (captureNotify != null && "SUCCESS".equals(captureNotify.getResult().getResultCode())) {
                // handle your own business logic.
                System.out.println("receive capture notify: " + JSON.toJSONString(captureNotify));
                return Result.builder().resultCode("SUCCESS").resultMessage("success.").resultStatus(ResultStatusType.S).build();
            }
        }

    } catch (Exception e) {
        // handle error condition
        return Result.builder().resultCode("FAIL").resultMessage("fail.").resultStatus(ResultStatusType.F).build();
    }

    return Result.builder().resultCode("SYSTEM_ERROR").resultMessage("system error.").resultStatus(ResultStatusType.F).build();
}
You do not need to sign the response for the notification result. However, you must respond to each notification request in the following fixed format, regardless of whether the payment is successful or not.
{
    "result": {
        "resultCode": "SUCCESS",
        "resultStatus": "S",
        "resultMessage": "success"
    }
}
Step 4: Obtain the capture result
If payment is successful, Antom will automatically initiate capture for you, while you can also initiate capture manually. After capture, you can obtain the capture result either via asynchronous notification or active query. You should decide whether to ship goods based on the capture result. For specific operations, refer to Capture.
After payments
Inquire payments
In addition to obtaining the buyer's payment result through the asynchronous notification, you can retrieve the corresponding payment result through the inquiry payments service. You can call the inquiryPayment API and use the paymentRequestId from the payment session to check the payment status.
The following code shows how to call the inquiryPayment API:
public static void inquiryPayment() {
    AlipayPayQueryRequest alipayPayQueryRequest = new AlipayPayQueryRequest();

    // replace with your paymentRequestId
    alipayPayQueryRequest.setPaymentRequestId("yourPaymentRequestId");

    AlipayPayQueryResponse alipayPayQueryResponse = null;
    try {
        alipayPayQueryResponse = CLIENT.execute(alipayPayQueryRequest);
    } catch (AlipayApiException e) {
        String errorMsg = e.getMessage();
        // handle error condition
    }
}
The following code shows an example of a response:
{
    "actualPaymentAmount": {
        "currency": "USD",
        "value": "1"
    },
    "customsDeclarationAmount": {
        "currency": "CNY",
        "value": "7"
    },
    "paymentAmount": {
        "currency": "USD",
        "value": "1"
    },
    "paymentId": "20250305194010800100188690281017336",
    "paymentMethodType": "ALIPAY_CN",
    "paymentRedirectUrl": "https://checkout.antom.com/checkout-page/pages/payment/index.html?sessionData=%2BCUim8L0KviXagaygm9xBL5jZ%2F75w6gAX1nn8pcuFuGkIsMoHtD6U88YSyMrMJvorbwnBg5uQv8e6pyvIpjDQQ%3D%3D%26%26SG%26%26188%26%26eyJleHRlbmRJbmZvIjoie1wiT1BFTl9NVUxUSV9QQVlNRU5UX0FCSUxJVFlcIjpcInRydWVcIixcImxvY2FsZVwiOlwiZW5fVVNcIixcImRpc3BsYXlBbnRvbUxvZ29cIjpcInRydWVcIn0iLCJwYXltZW50U2Vzc2lvbkNvbmZpZyI6eyJwYXltZW50TWV0aG9kQ2F0ZWdvcnlUeXBlIjoiQUxMIiwicHJvZHVjdFNjZW5lIjoiQ0hFQ0tPVVRfUEFZTUVOVCIsInByb2R1Y3RTY2VuZVZlcnNpb24iOiIxLjAifSwic2VjdXJpdHlDb25maWciOnsiYXBwSWQiOiIiLCJhcHBOYW1lIjoiT25lQWNjb3VudCIsImJpelRva2VuIjoiNlRjZGJyMnJGM3JQWXg0aGtWckhxYnZqIiwiZ2F0ZXdheSI6Imh0dHBzOi8vaW1ncy1zZWEuYWxpcGF5LmNvbS9tZ3cuaHRtIiwiaDVnYXRld2F5IjoiaHR0cHM6Ly9vcGVuLXNlYS1nbG9iYWwuYWxpcGF5LmNvbS9hcGkvb3Blbi9yaXNrX2NsaWVudCIsIndvcmtTcGFjZUlkIjoiIn0sInNraXBSZW5kZXJQYXltZW50TWV0aG9kIjpmYWxzZX0%3D",
    "paymentRequestId": "PAYMENT_20250305220039086_AUTO",
    "paymentResultCode": "SUCCESS",
    "paymentResultMessage": "success.",
    "paymentStatus": "SUCCESS",
    "paymentTime": "2025-03-05T06:02:34-08:00",
    "pspCustomerInfo": {
        "pspName": "ALIPAY_CN"
    },
    "result": {
        "resultCode": "SUCCESS",
        "resultMessage": "success.",
        "resultStatus": "S"
    }
}
Please handle the result based on the value of the paymentStatus parameter in the response. For specific return values, refer to the API documentation.
Note: When inquiring about the transaction, if the buyer does not submit the order, the
ORDER_NOT_EXISTerror code will be returned. This error is not returned if the order is submitted.
Refund
To learn about Antom refund rules and how to initiate a refund for a successful transaction, see Refund for more information.
Dispute
When a buyer chooses to pay with a card, a dispute may occur. To learn more, see Dispute resolution.
Reconciliation
After the transaction is completed, use the financial reports provided by Antom for reconciliation. For more information on how to reconcile and the settlement rules of Antom, please refer to Reconciliation.
Payment method features
Card payments
If your payment method includes card payments, the buyer's information from the merchant side must be passed in the payment session parameters. In the order.buyer field, at least one of the following parameters must be provided: referenceBuyerId, buyerPhoneNo, or buyerEmail. If the buyer's information is not provided, when the buyer selects the card payment method and submits the payment, an error will occur on the page, resulting in the inability to complete the payment process.
{
    "order": {
        ...
        "buyer": {
            "referenceBuyerId": "88888888",
            "buyerEmail": "gaga@test.com",
            "buyerPhoneNo": "18888888888"
        }
    },
...
}
Activate 3D Secure 2
For more information, refer to 3D Secure 2.
APM payments
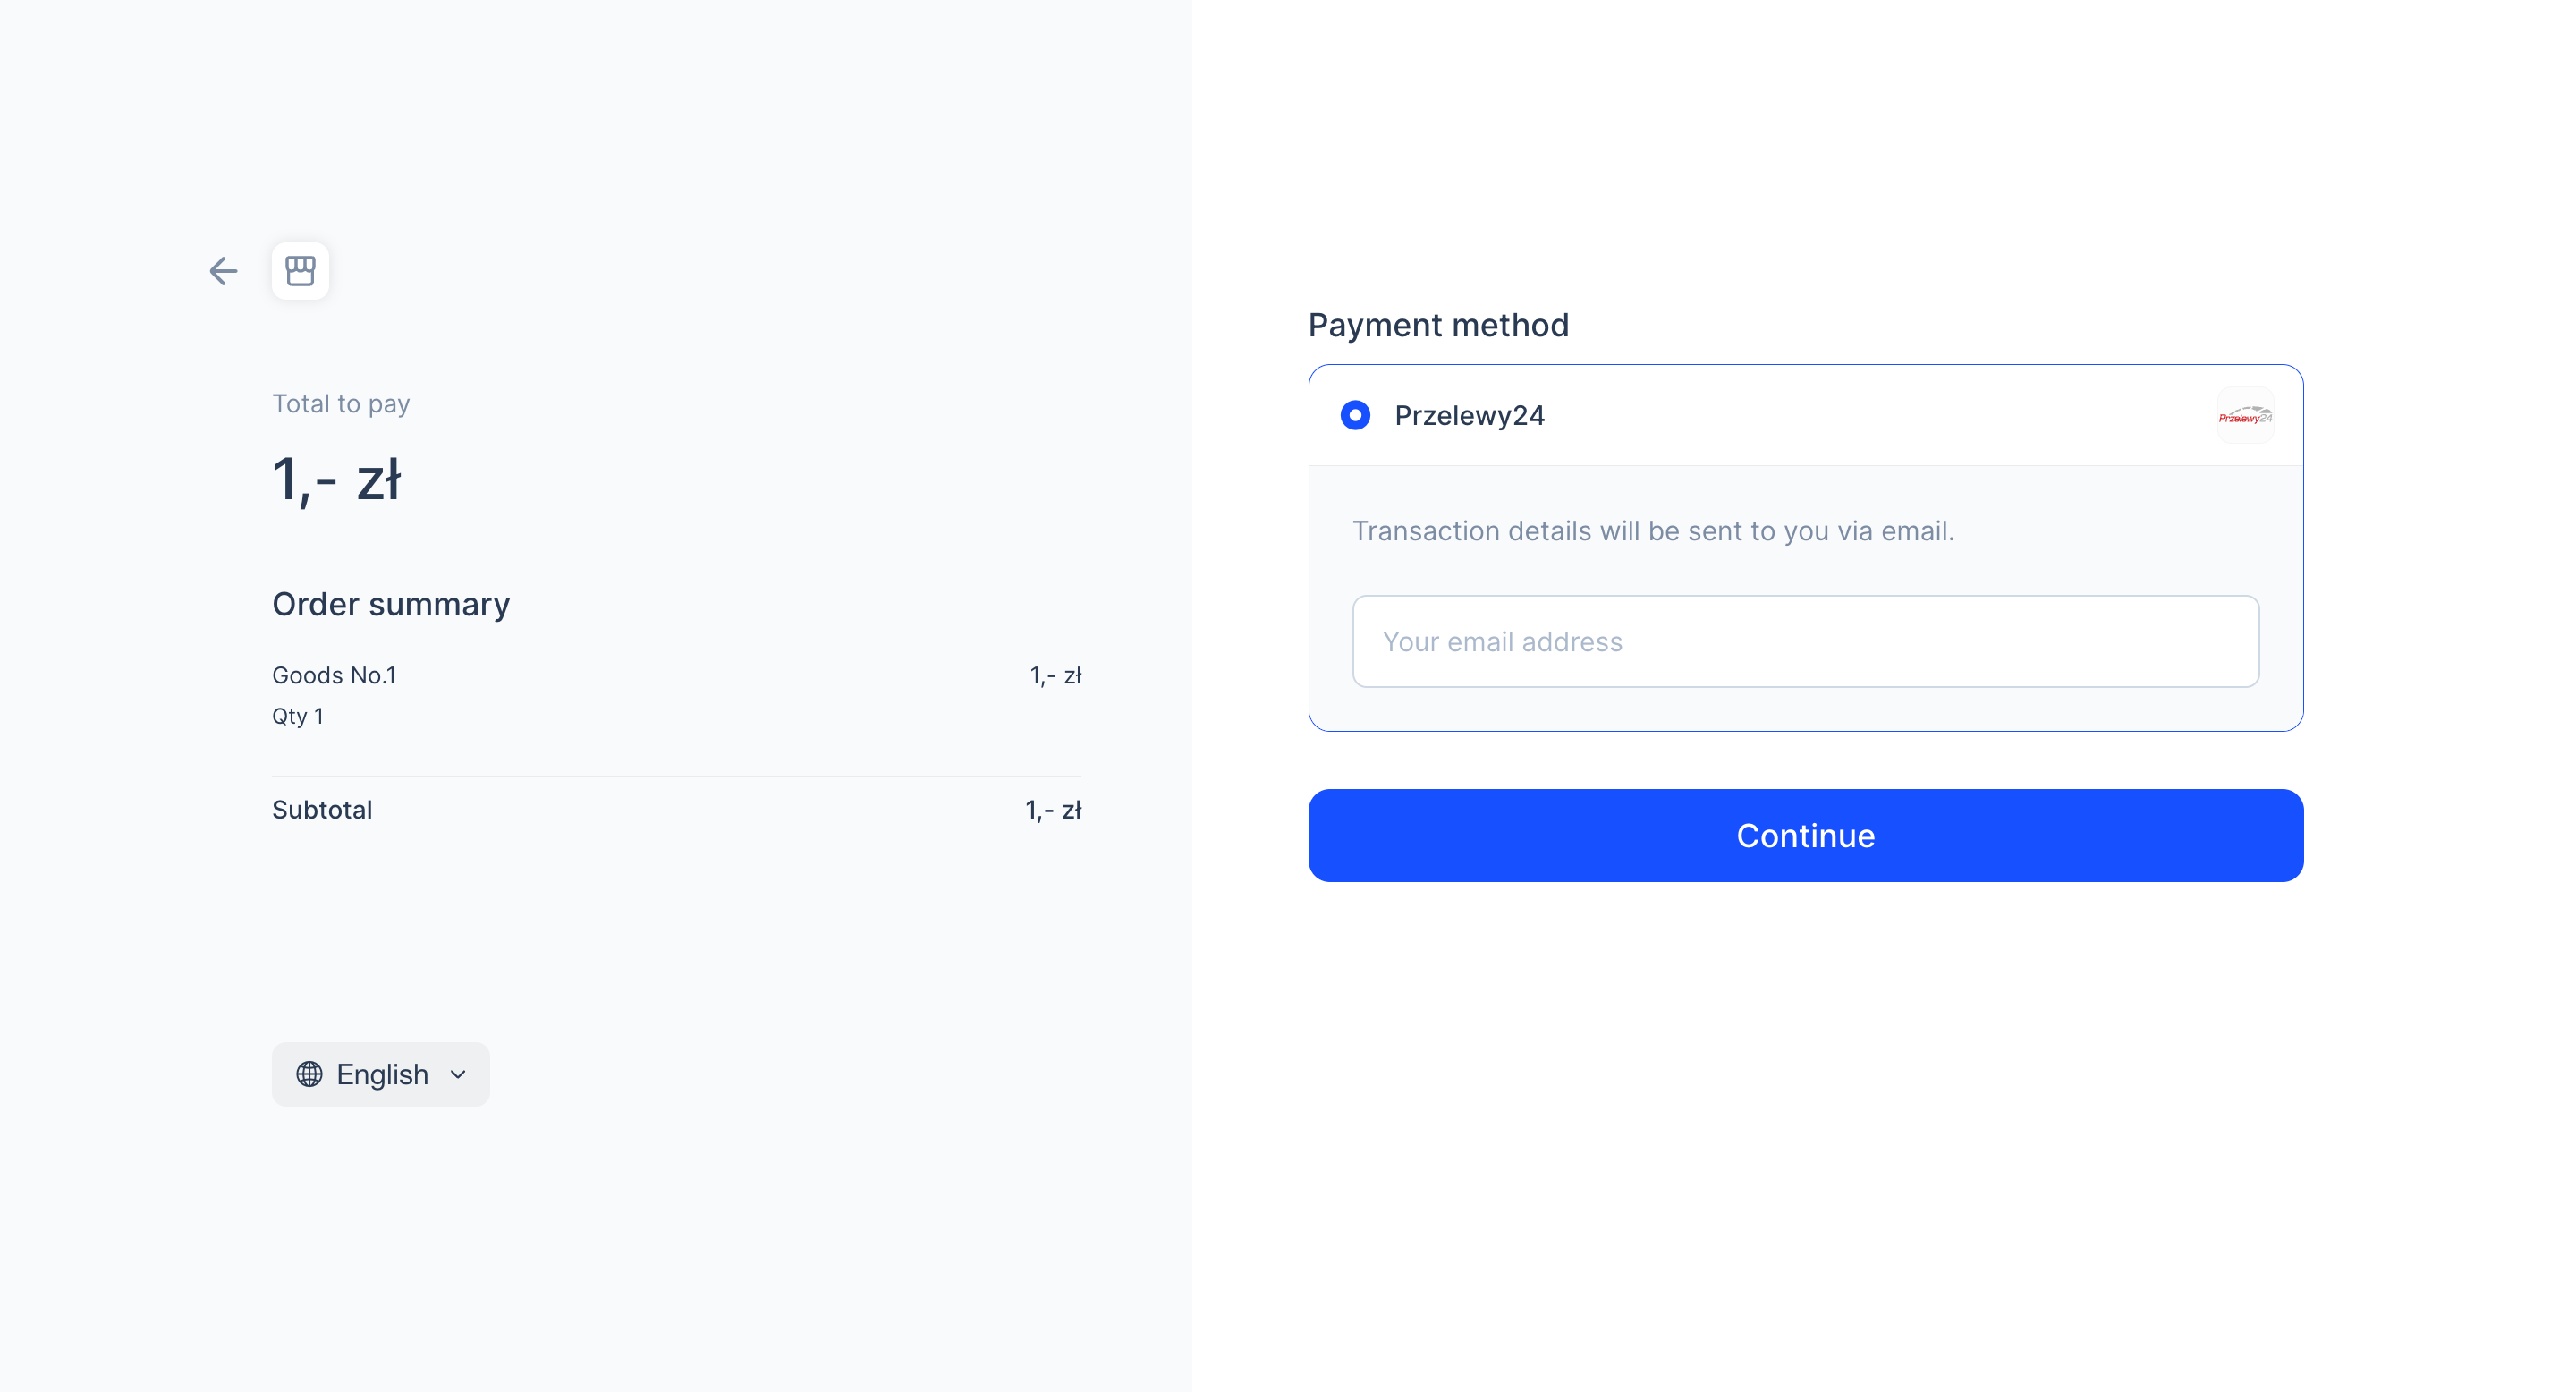
Przelewy24
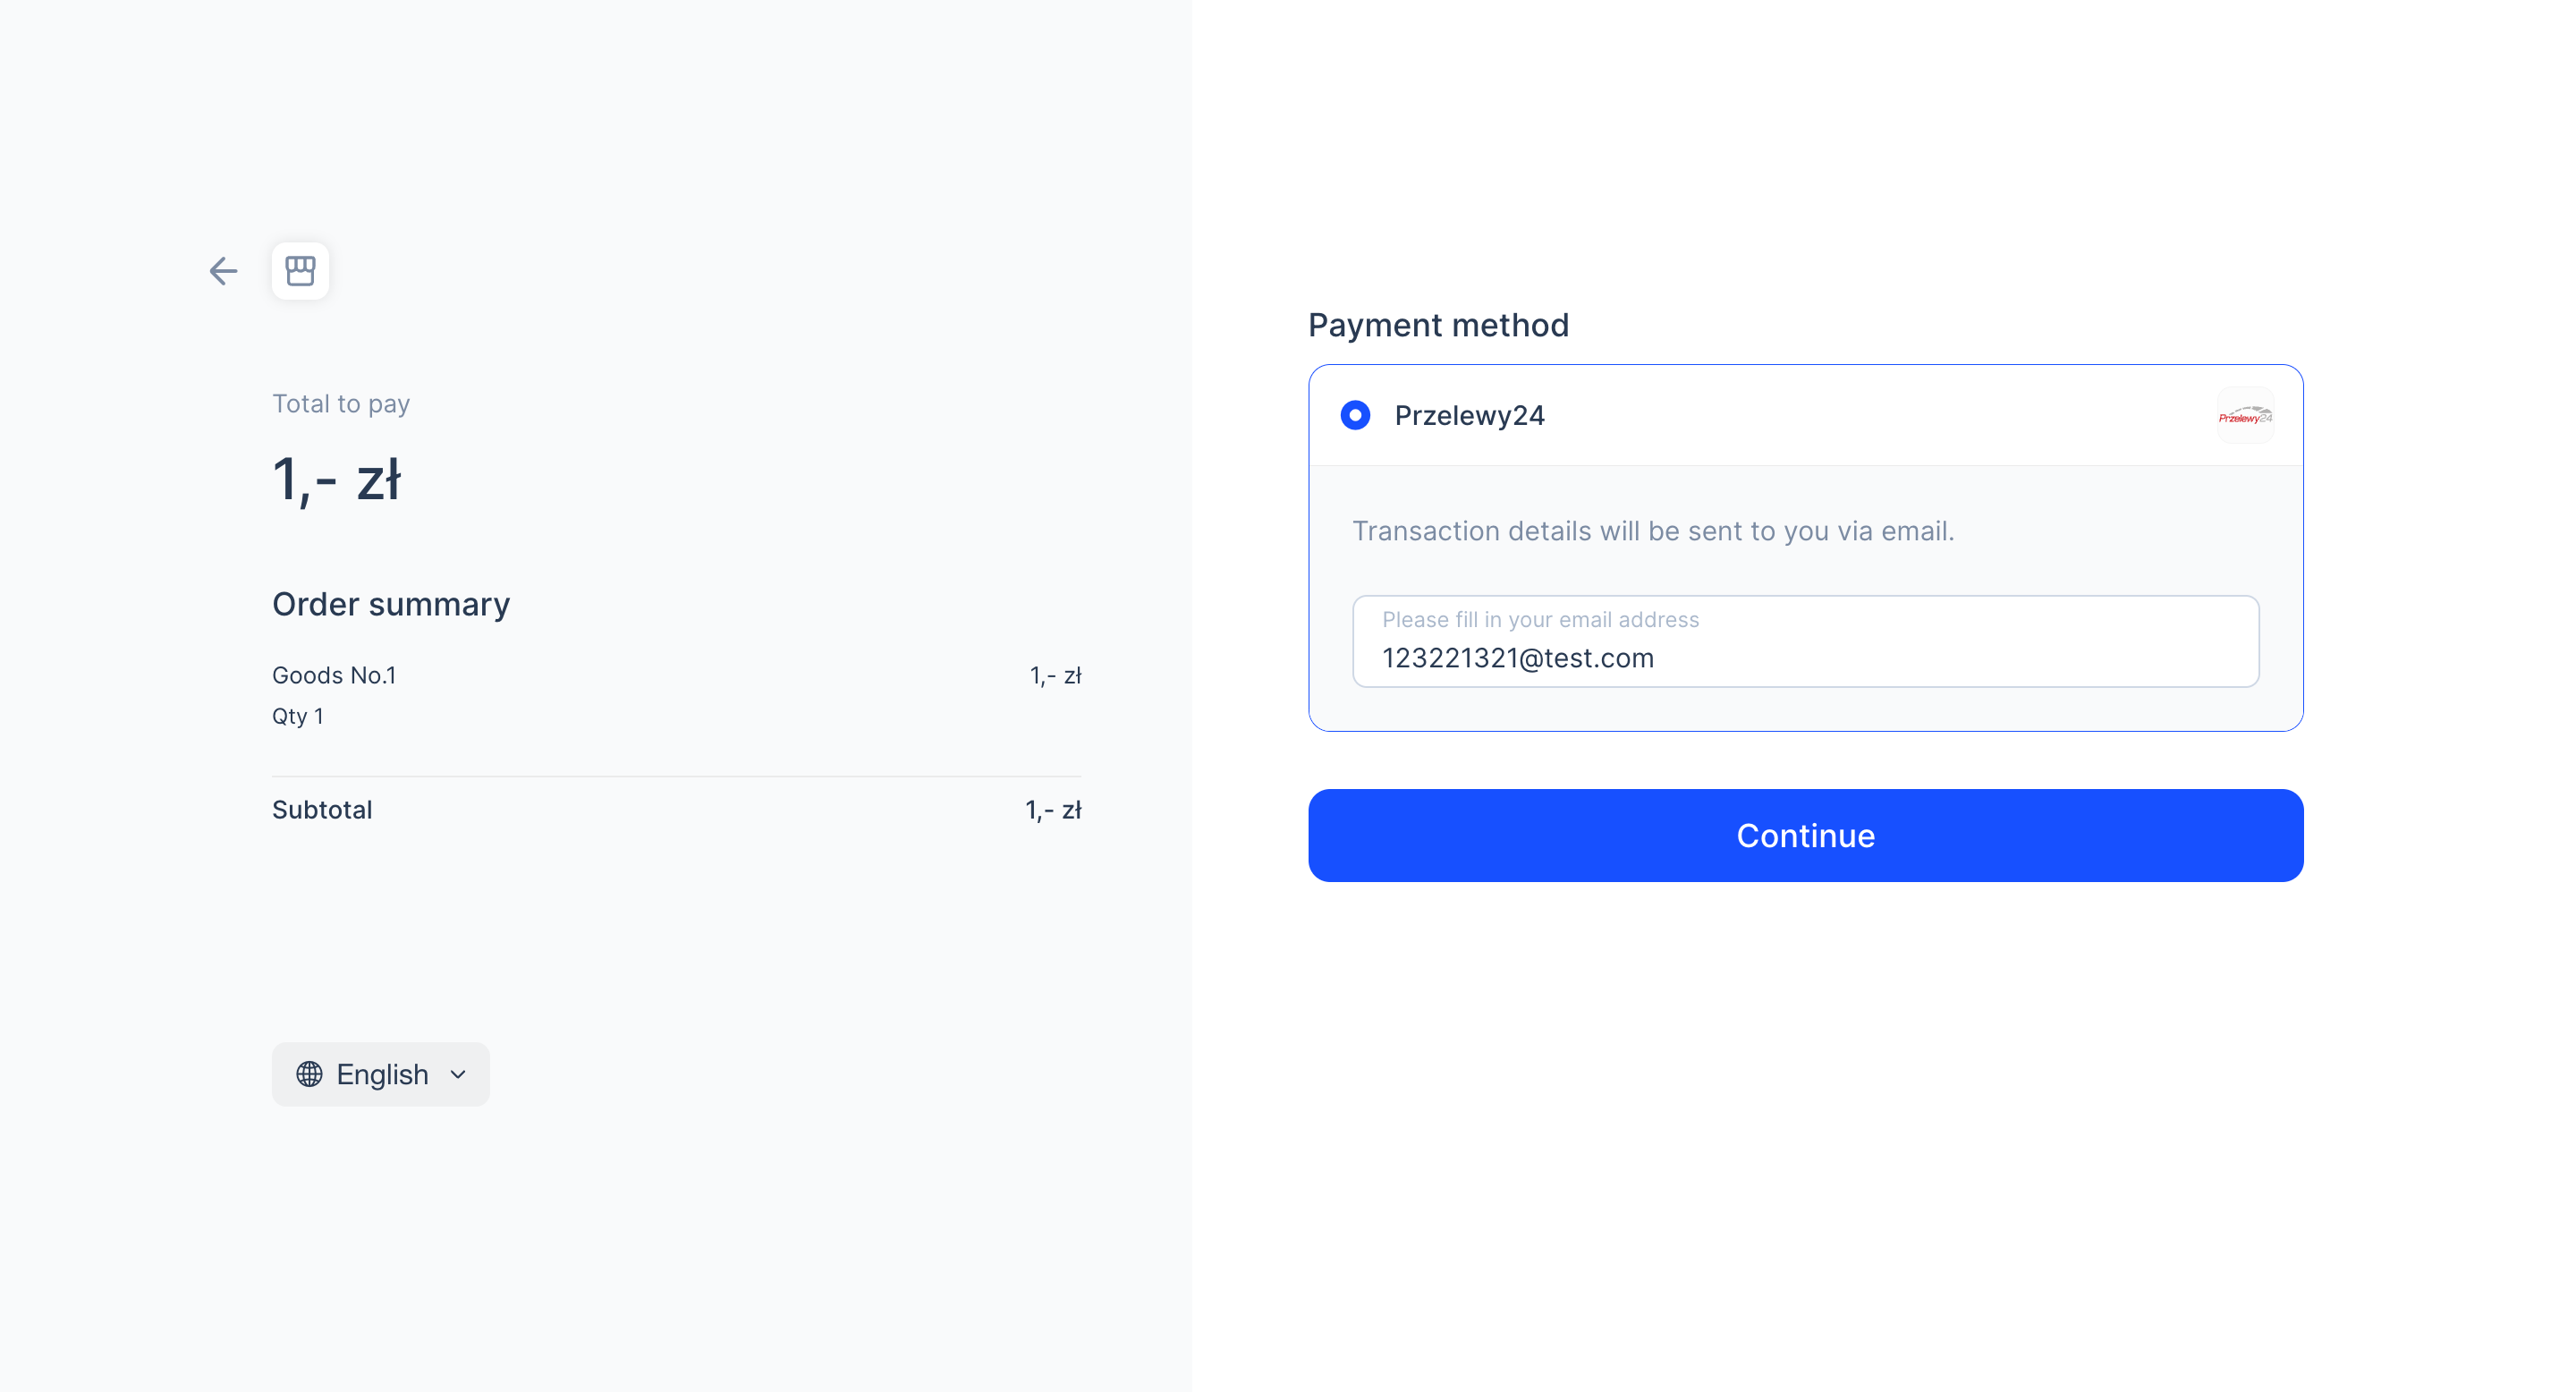
When the buyer selects Przelewy24 as the payment method, you can optimize the email input experience:
Pass the availablePaymentMethod.paymentMethodMetaData.payerEmail field in the createPaymentSession (One-time Payments) API. The Antom Checkout Page will automatically pre-fill the email address in the payment options, eliminating the need for manual input by the buyer.
The sample code:
{
  ...
    "availablePaymentMethod": {
        "paymentMethodMetaData": {
            "payerEmail": "123221321@test.com",
        }
    },
  ...
}
When the buyer selects Przelewy24 to pay, Antom Chechout page will pre-fill the email address:
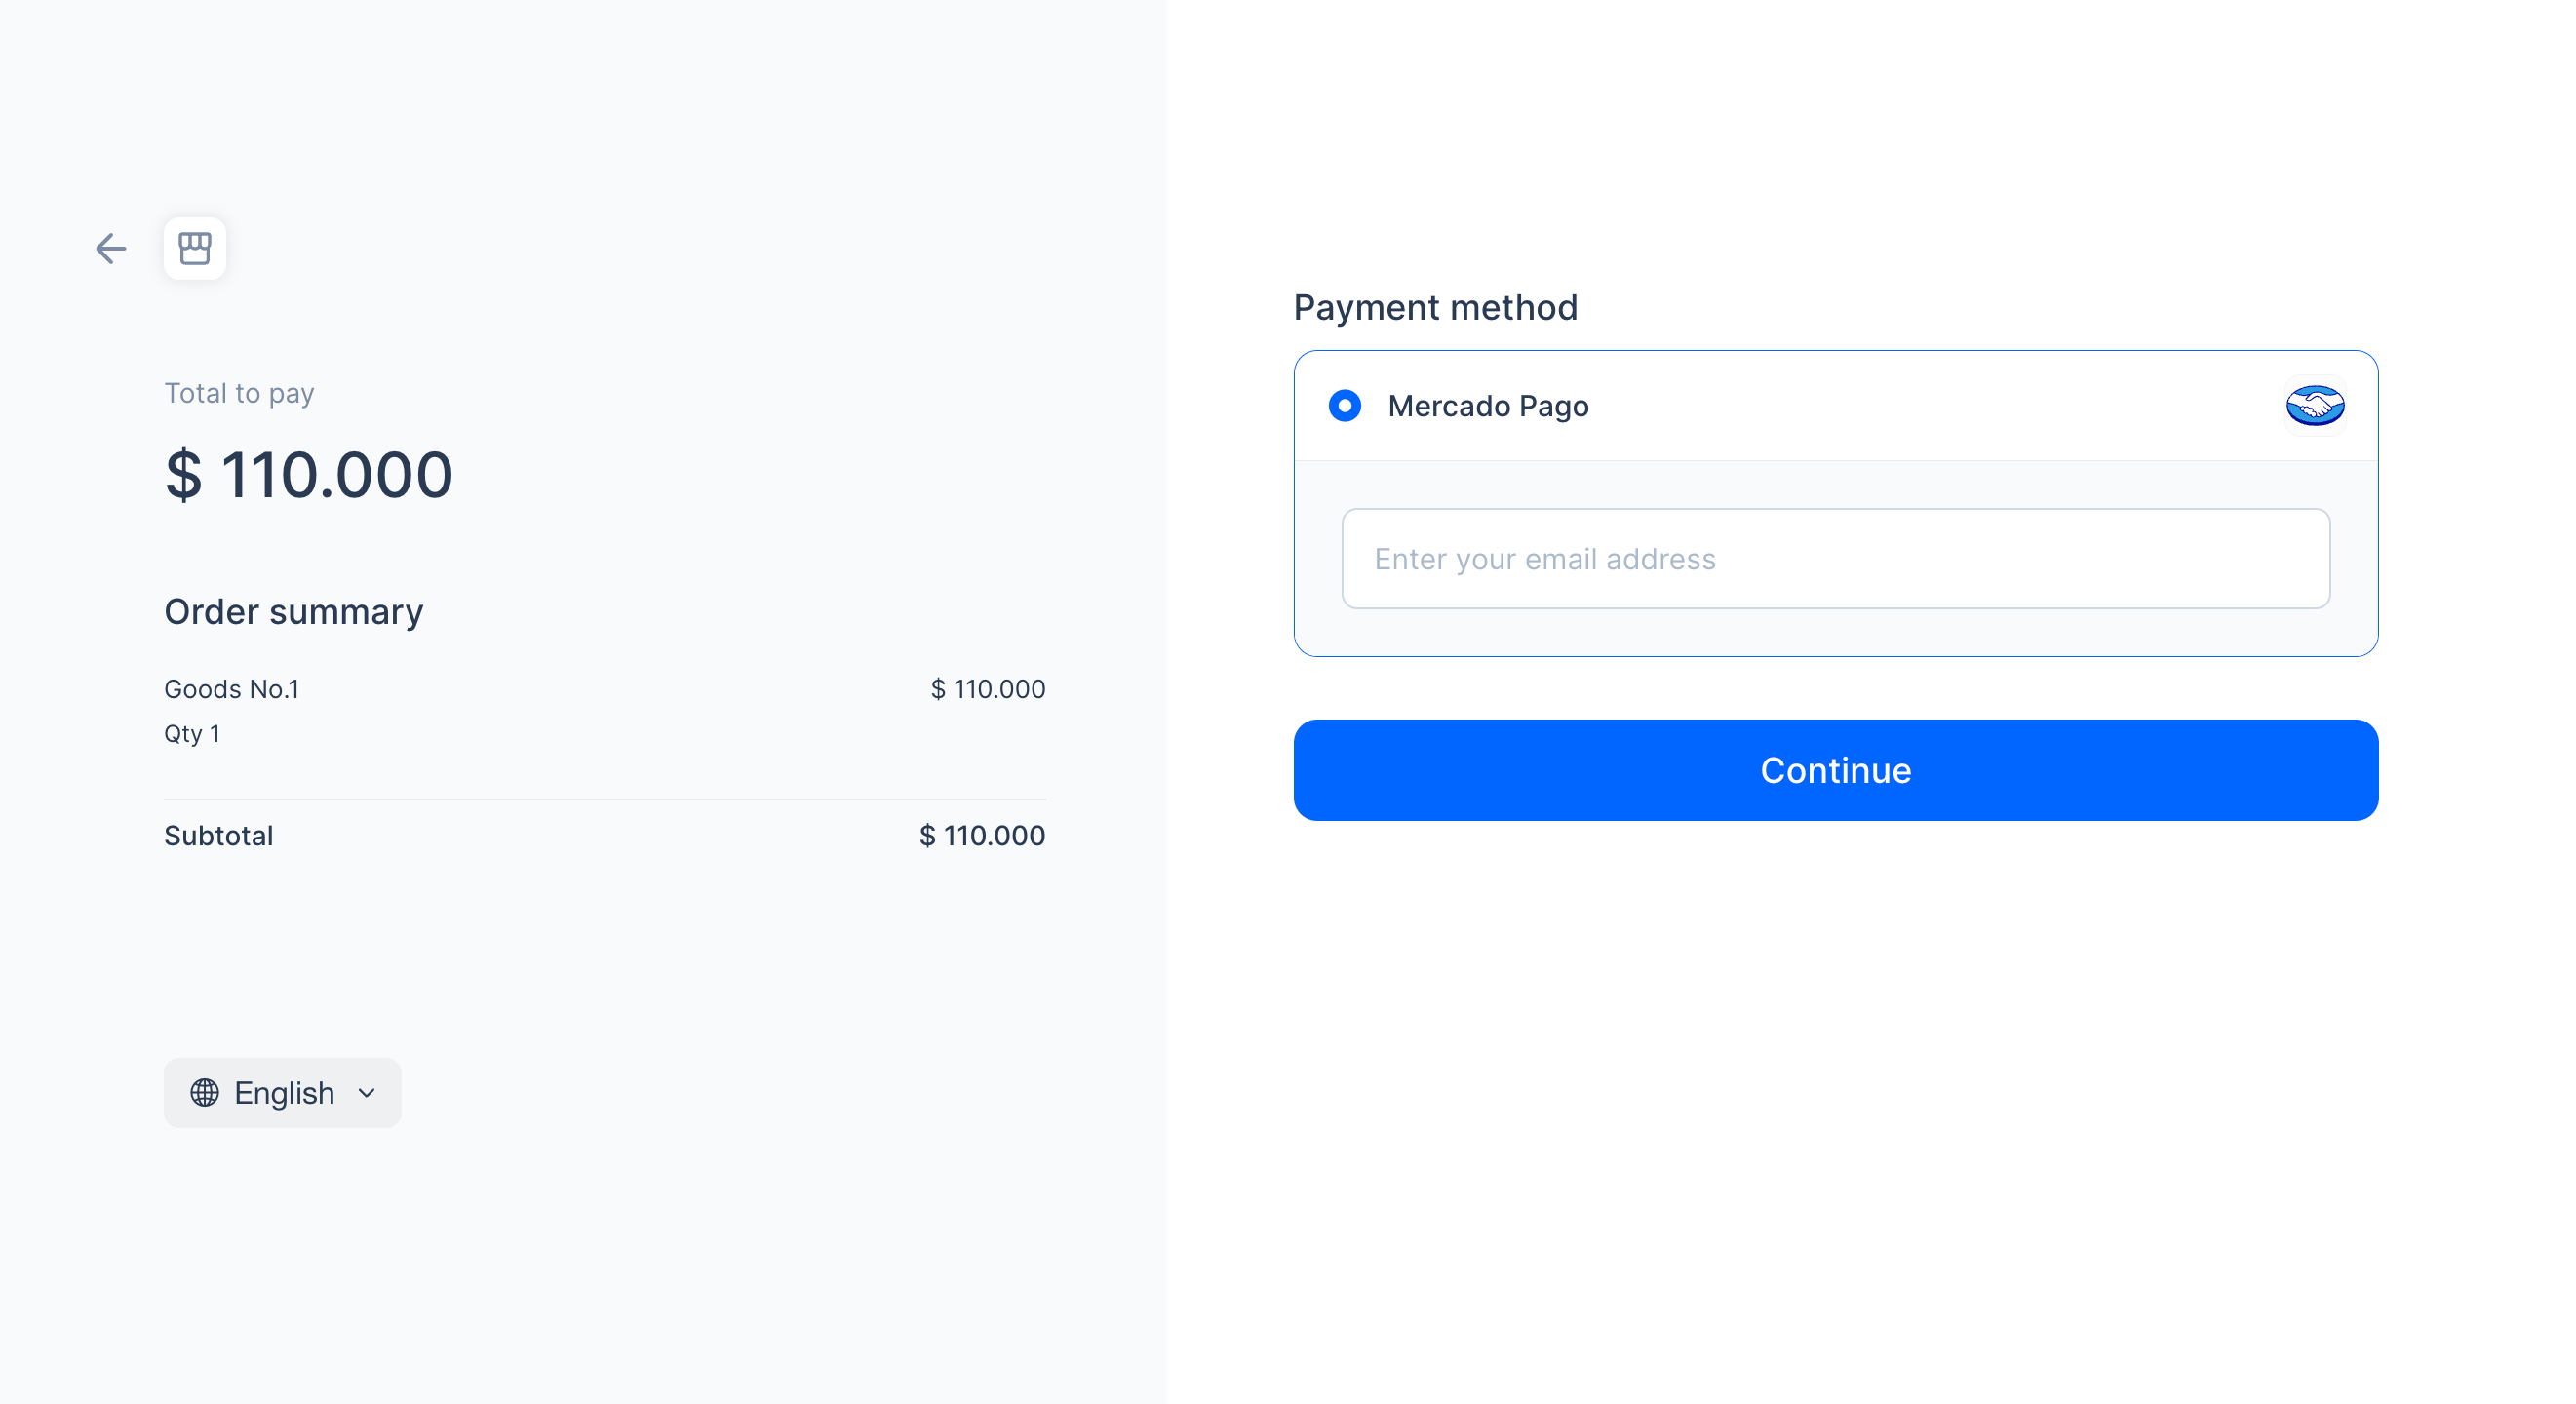
Mercado Pago
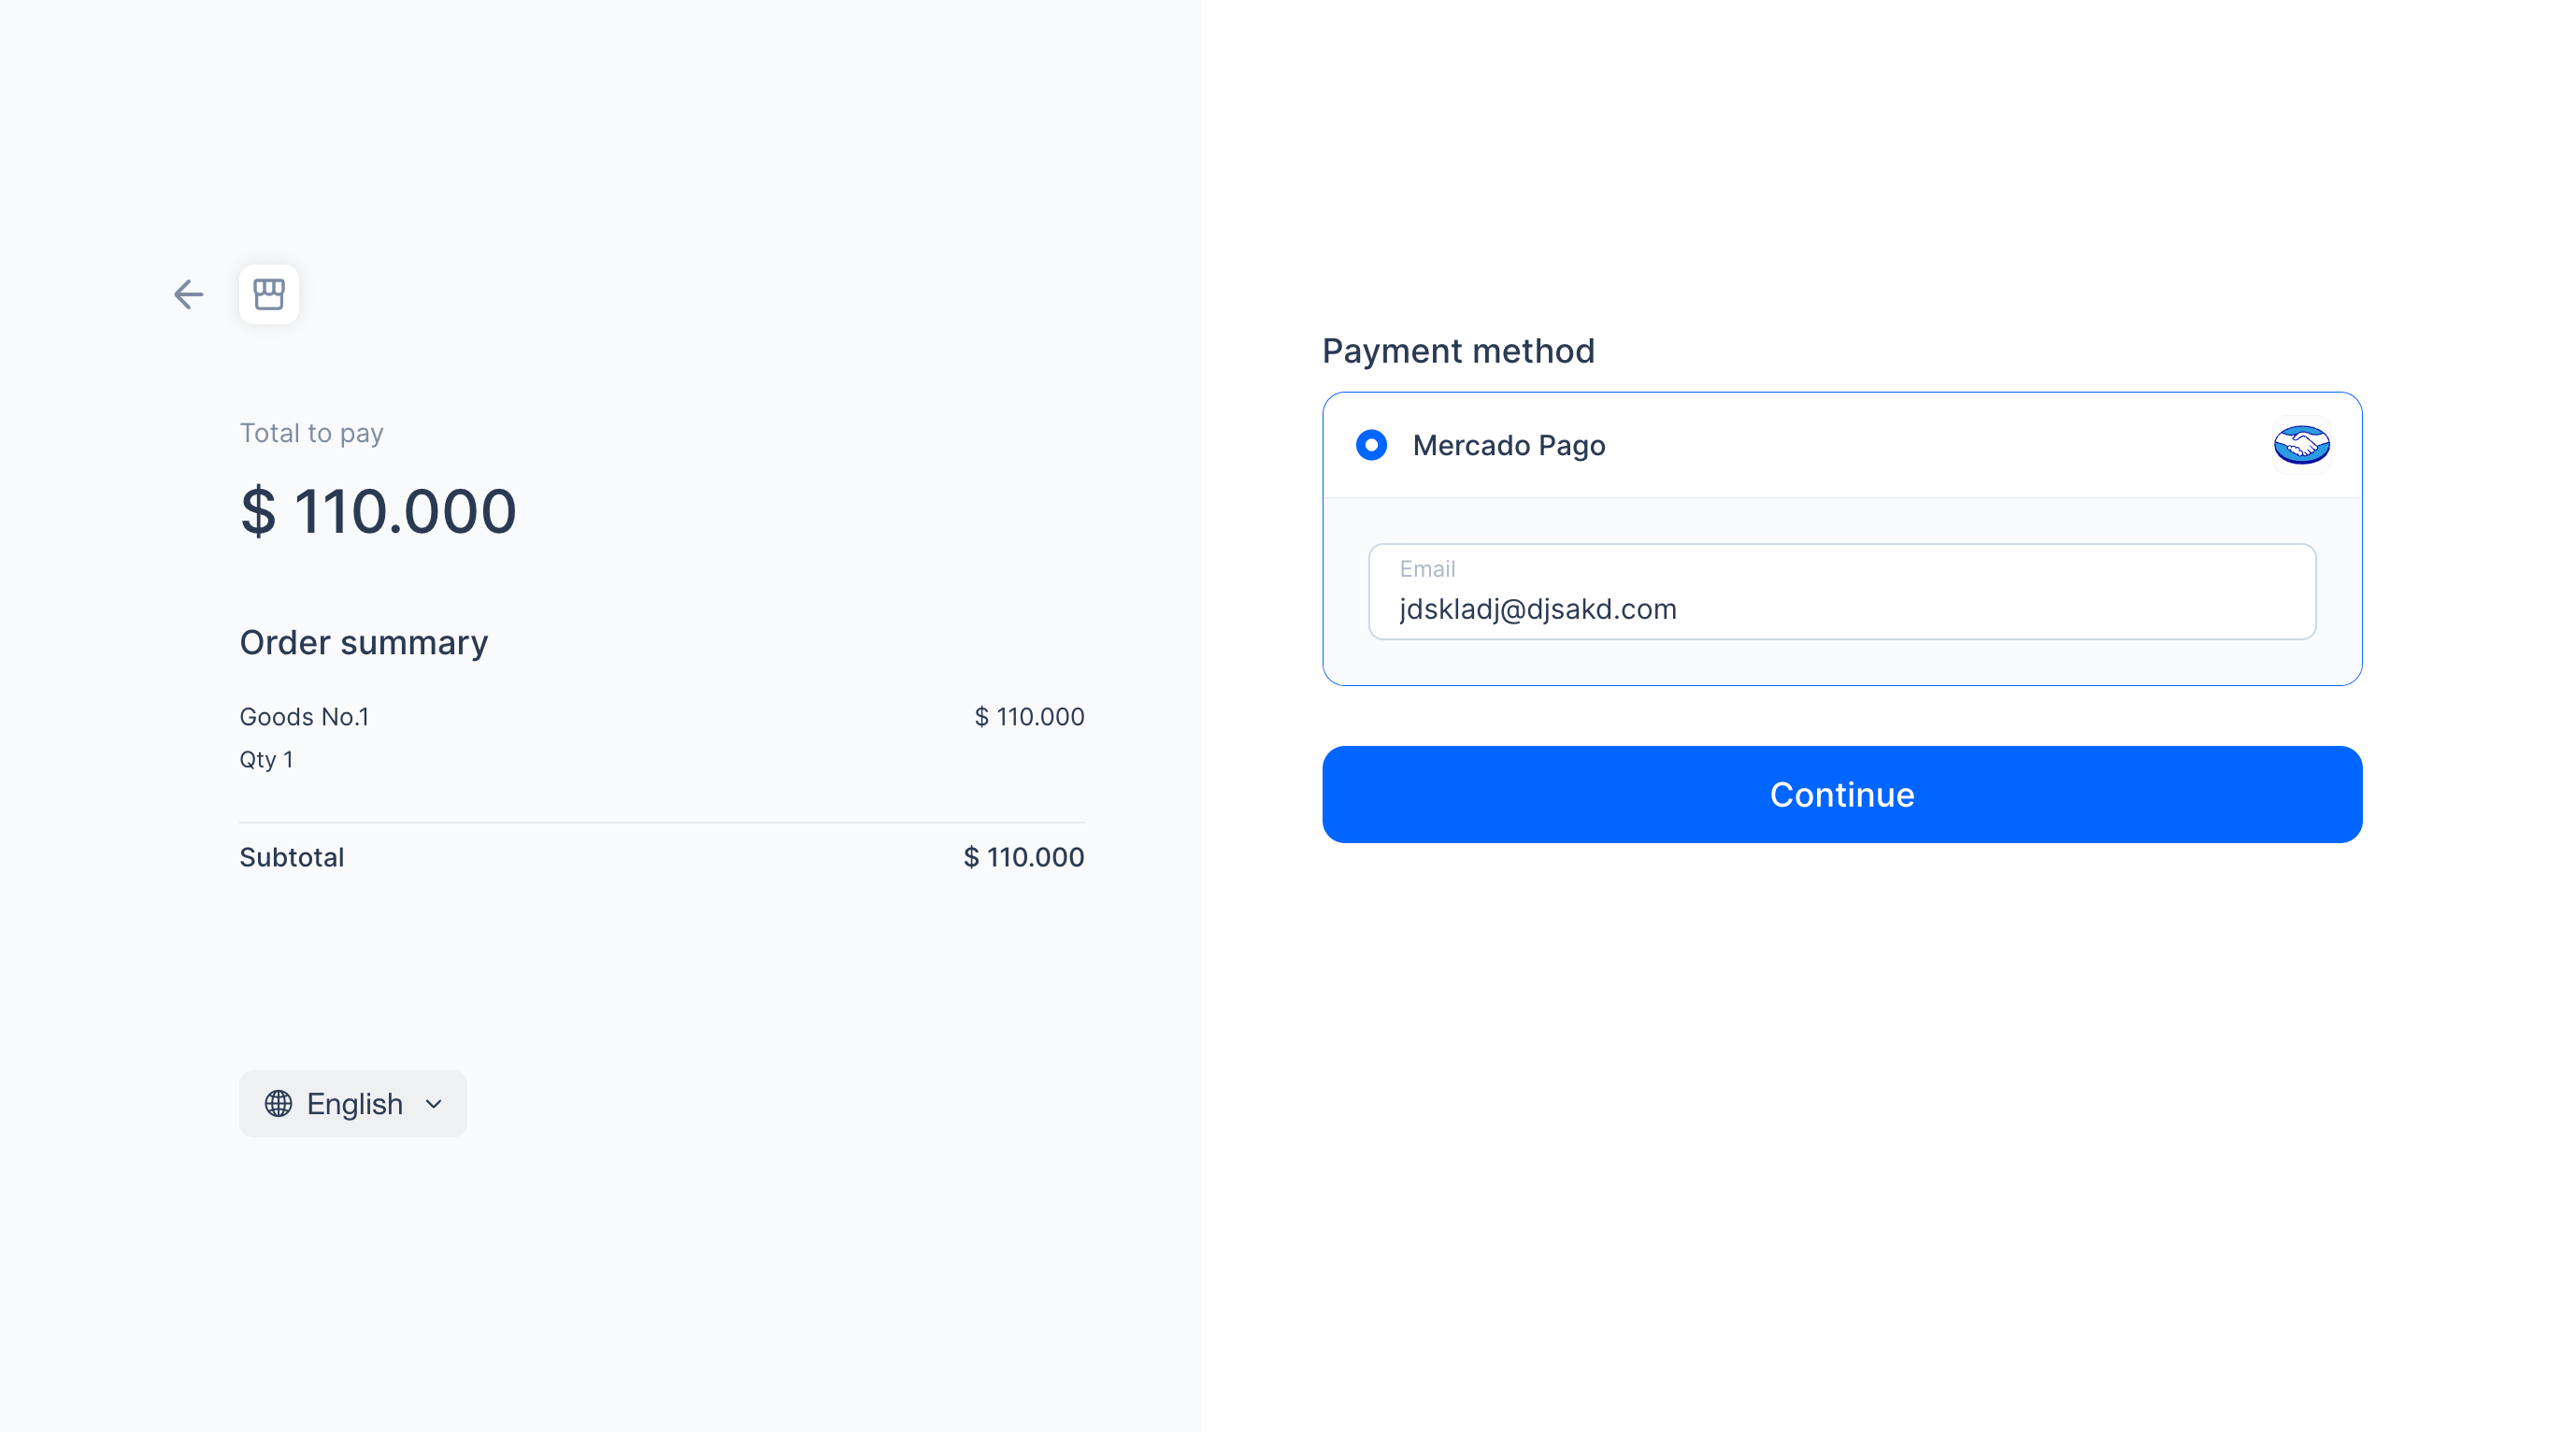
When the buyer selects Mercado Pago as the payment method, you can optimize the input experience using the following methods:
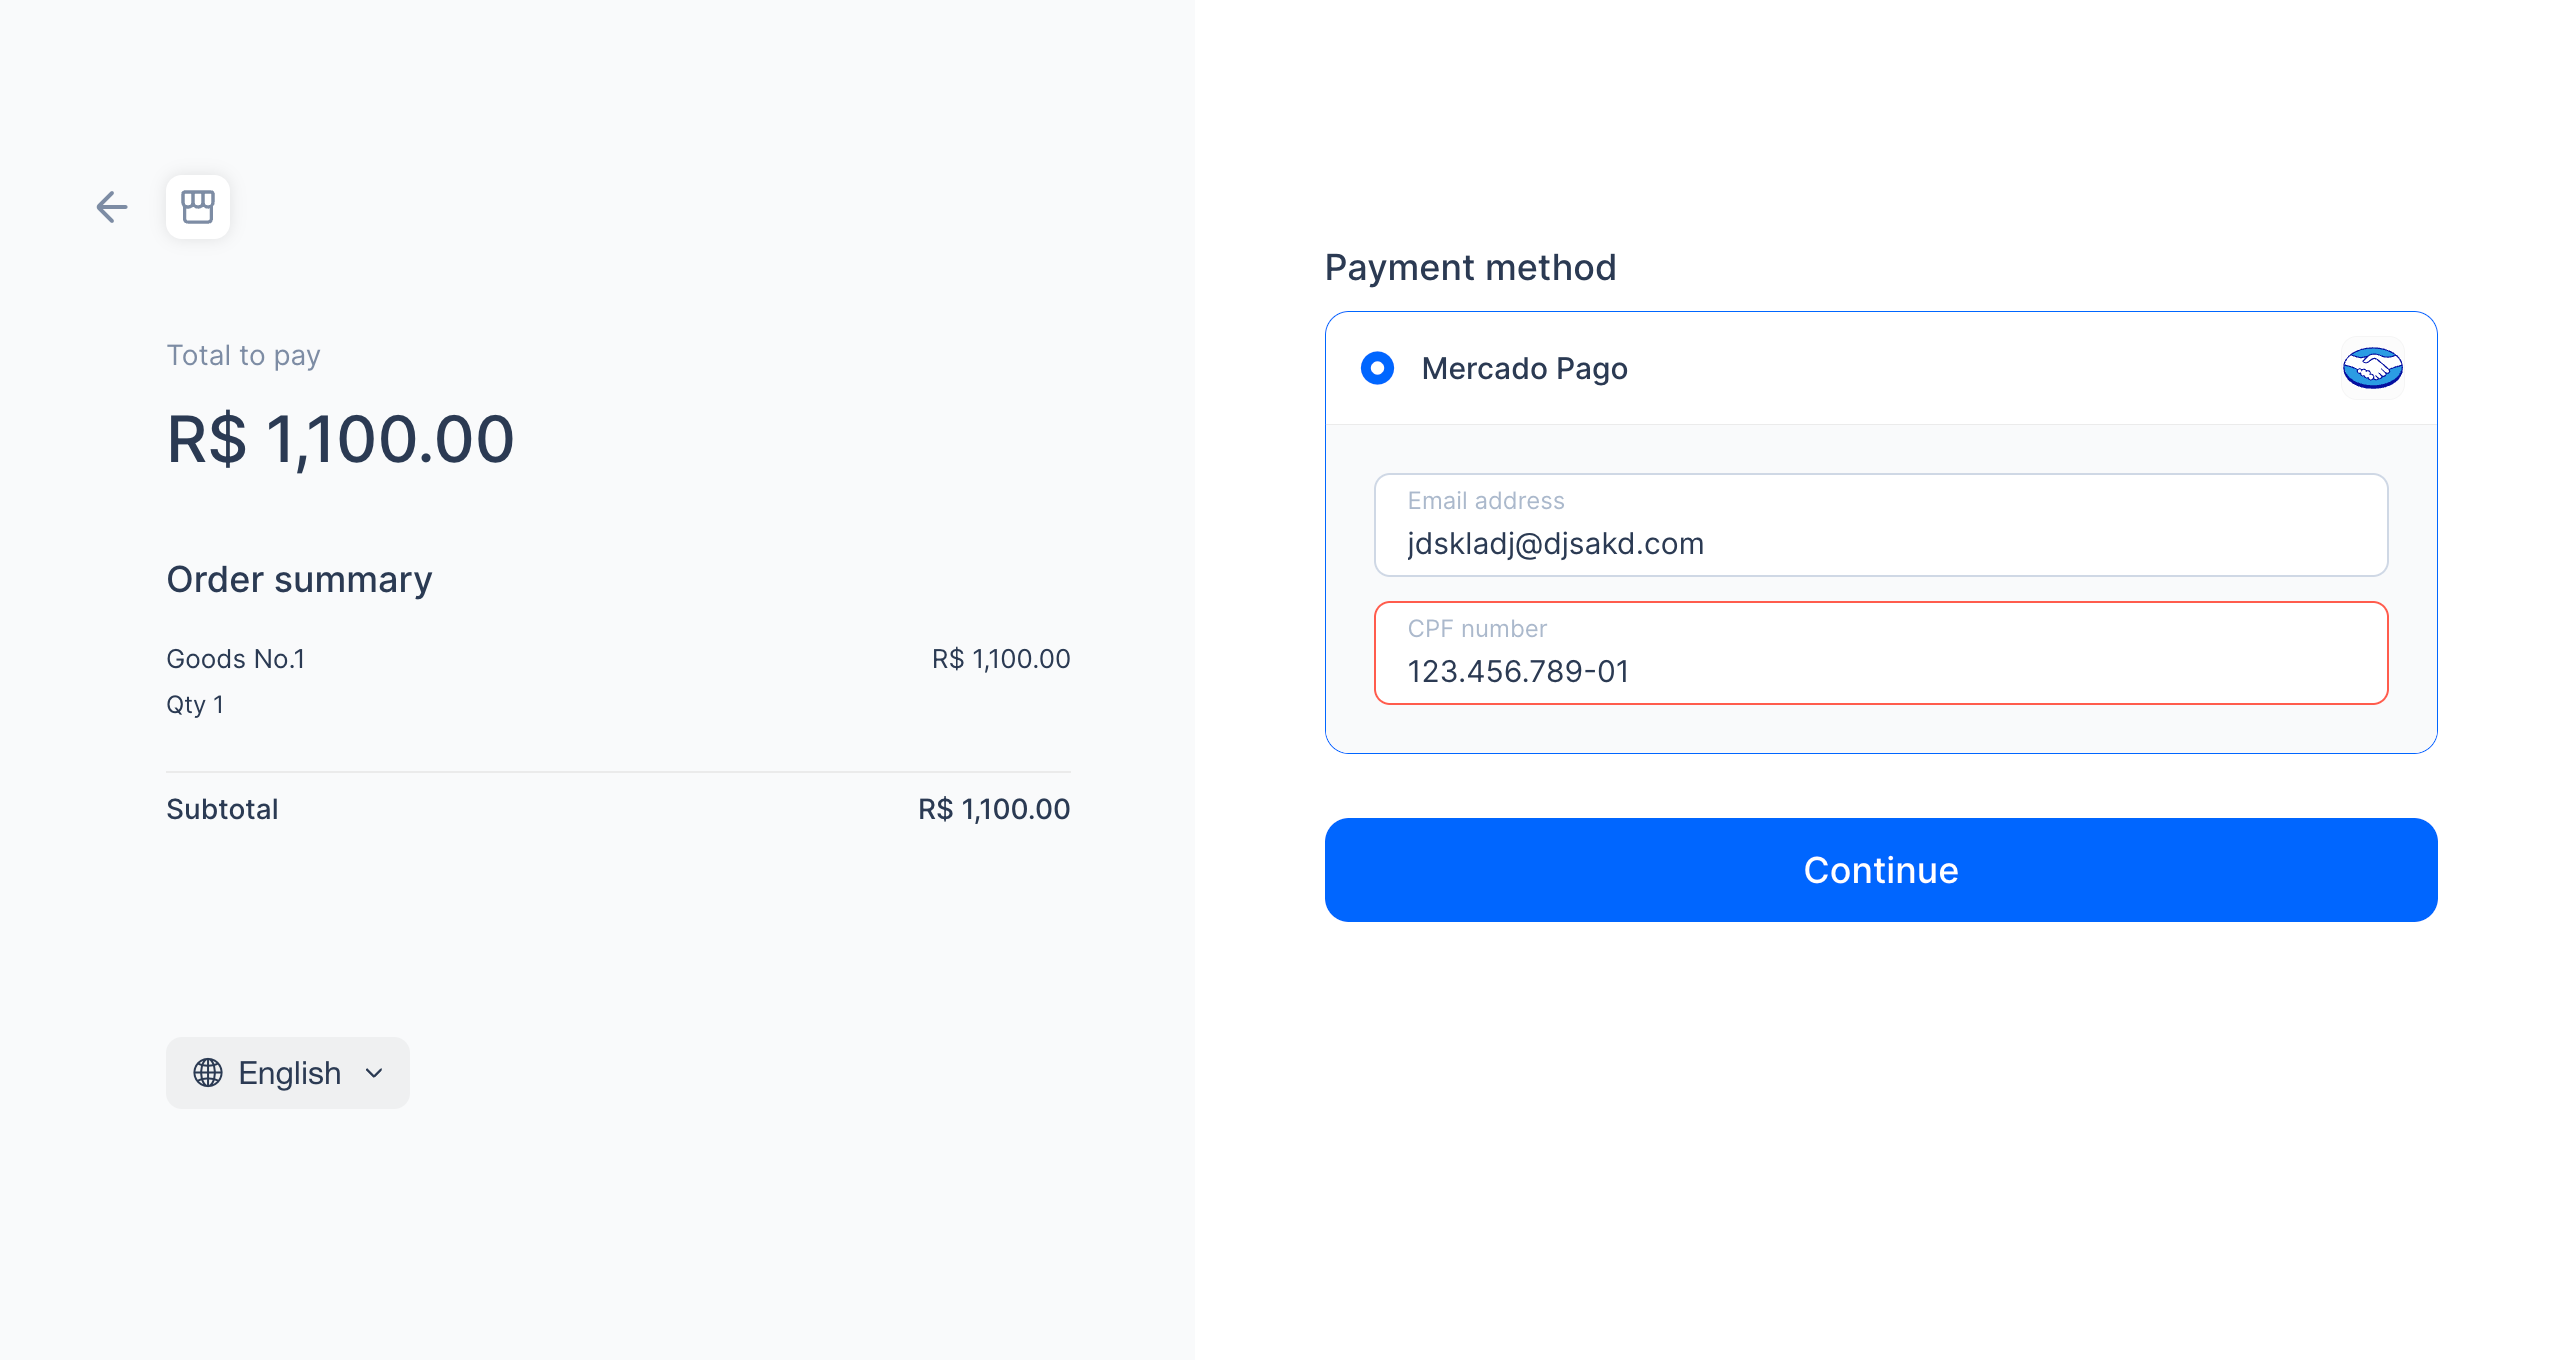
- Pass the availablePaymentMethod.paymentMethodMetaData.payerEmail field in the createPaymentSession (One-time Payments) API. The Antom Checkout Page will automatically pre-fill the email address in the payment options, eliminating the need for manual input by the buyer.
- Pass the availablePaymentMethod.paymentMethodMetaData.cpf field in the createPaymentSession (One-time Payments) API. The Antom Checkout Page will automatically pre-fill the CPF number, eliminating the need for manual input by the buyer.
The sample code:
{
  ...
    "availablePaymentMethod": {
        "paymentMethodMetaData": {
            "payerEmail": "123221321@test.com",
        }
    },
  ...
}
When the buyer selects Mercado Pago to pay, Antom Chechout page will pre-fill the email address:
Additional content
Antom Tokenization
With Antom Tokenization, you can allow buyers to save their card information during the first payment, saving them from needing to re-enter the information in subsequent transactions. This helps avoid payment failures caused by incorrect card details. For details, please refer to Antom Tokenization.
Specify a payment method
You can specify payment methods on Antom Dashboard through Payments > Checkout page > Payment methods. You can also pass the parameters in the createPaymentSession (One-time Payments) API to specify the display of payment methods on Checkout Page, the order of the payment method list, and the display of quick payments. For specific steps, refer to Specify a payment method.
Note: If you pass parameters through the API, the API values take priority.
This feature offers you the following benefits:
- Filter local payment methods based on your business region.
- Sort your preferred payment methods.
- Display the mainstream quick payments, such as Alipay, Apple Pay, and Google Pay.