Orchestration
This article introduces how to create, manage, or edit payment operation rules on the Orchestration page.
Configure payment operation rules
You can configure payment operation rules on APO Dashboard by following the steps to meet the payment processing needs of different business scenarios:
- Create a payment operation rule
- Add a node
- Publish the payment operation rule
Note: In this article, "channels" refers to payment method providers.
Step 1: Create a payment operation rule
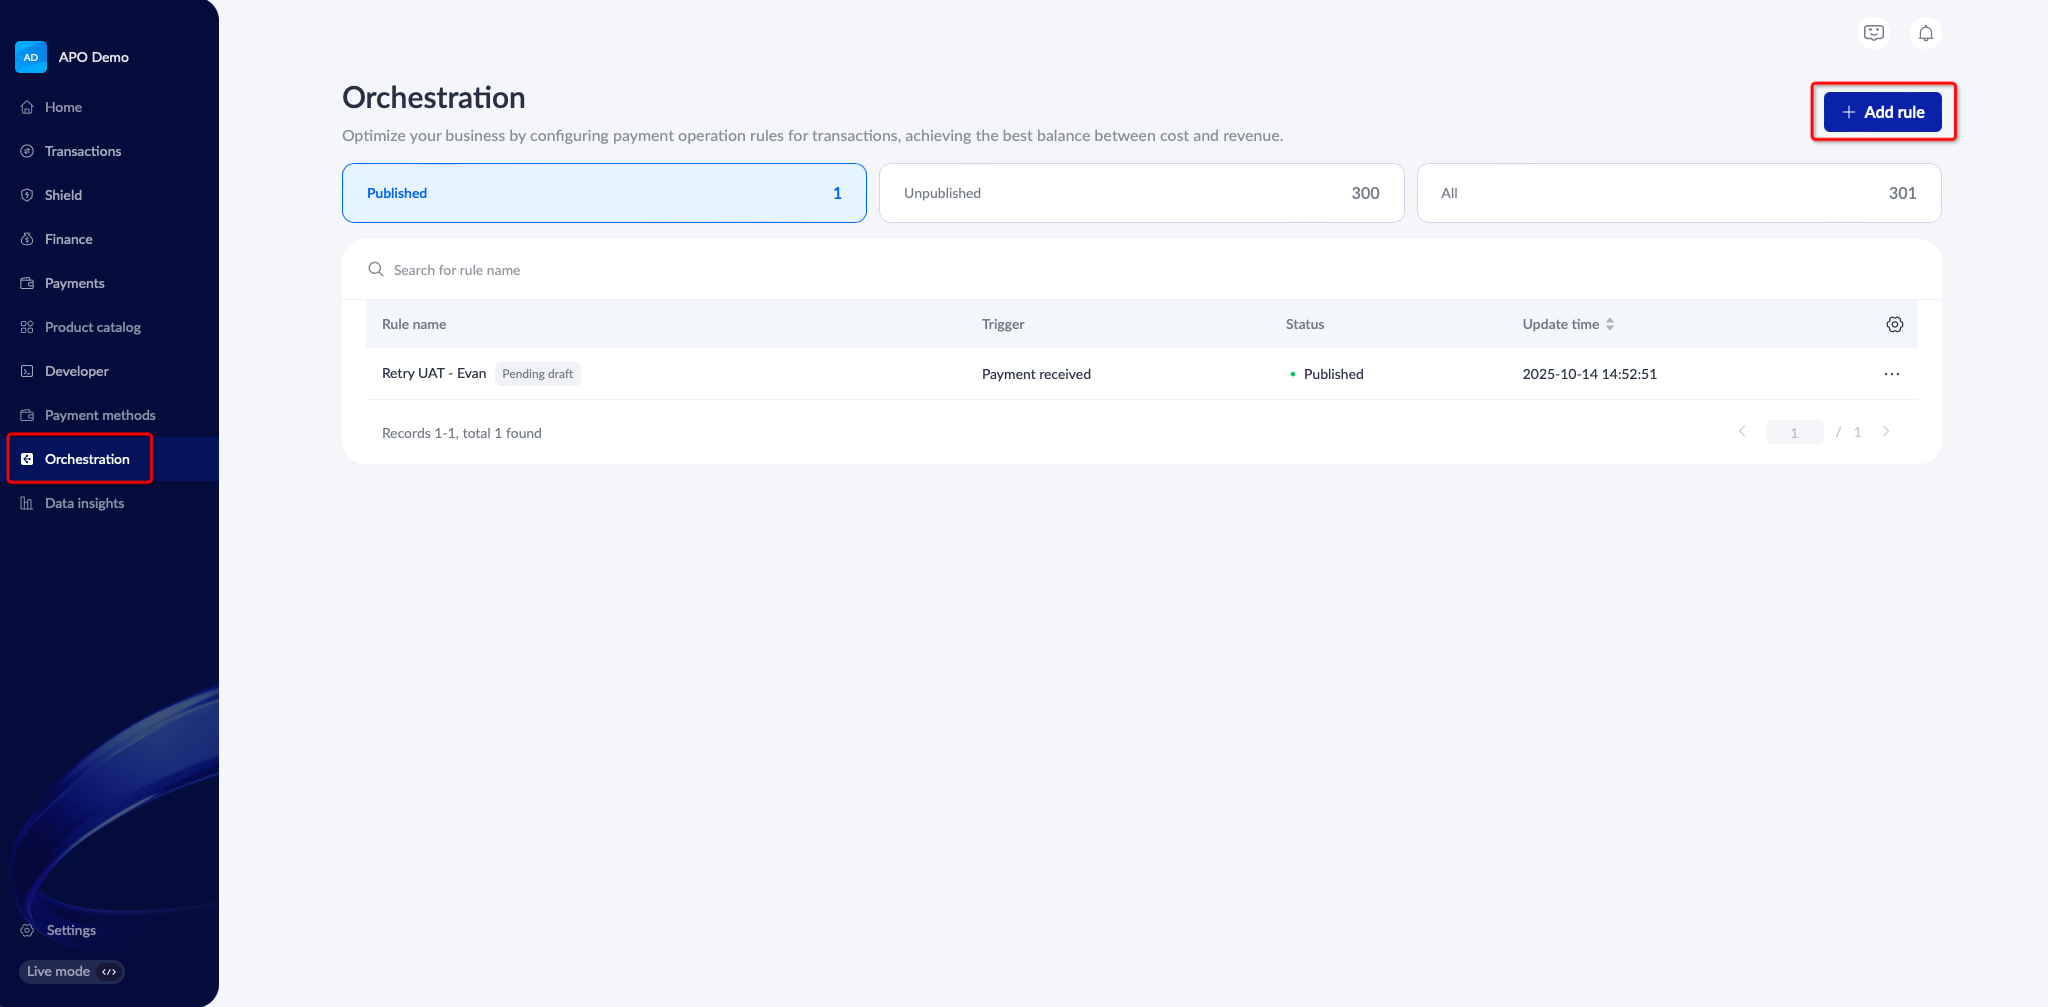
Log in to APO Dashboard, navigate to the Orchestration module, and click Add rule to create a new payment operation rule.
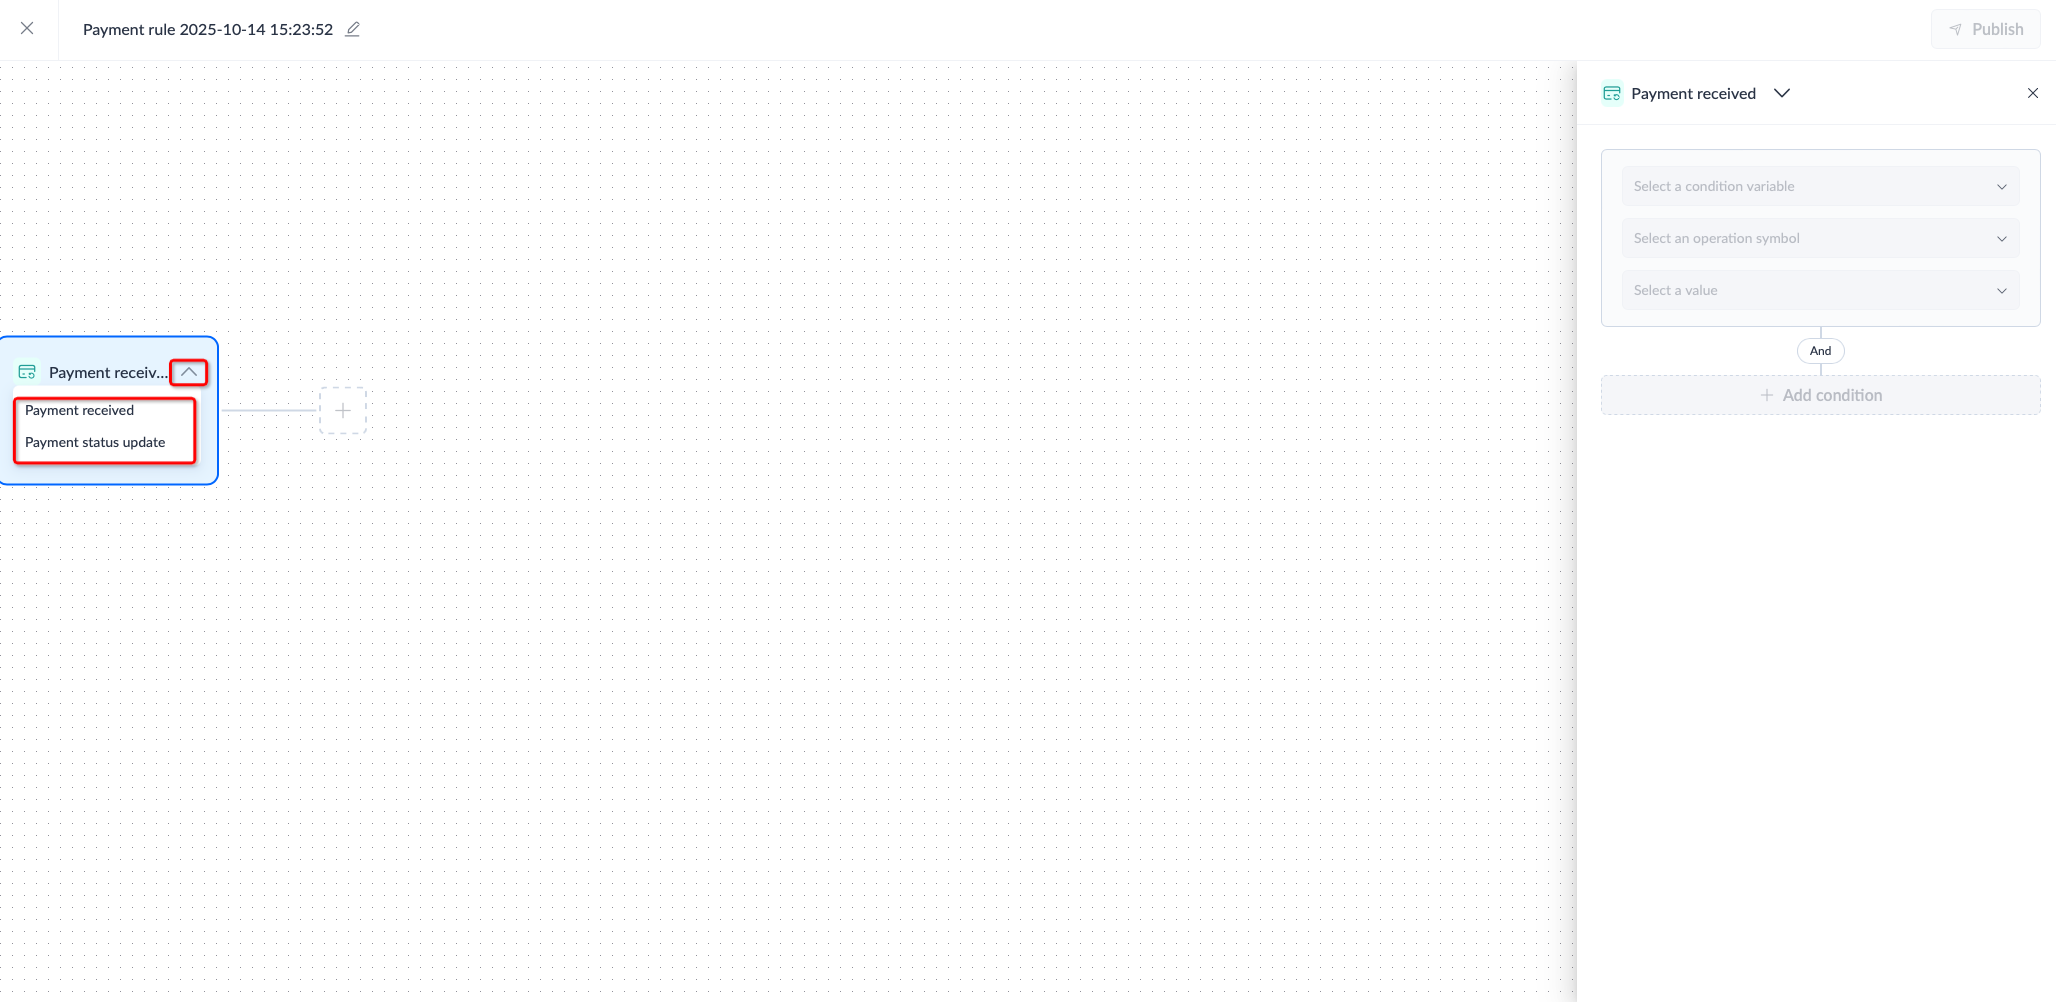
After entering the canvas, click the box, and click the drop-down button to select the appropriate trigger condition based on your business needs. Currently, the following triggers are supported:
- Payment received: The received payment is a card payment.
- Payment status update: The payment status is updated to "Failed".
Step 2: Add a node
Add the necessary nodes based on your business requirements:
- (Optional) Traffic routing
- (Optional) Set conditions
- Configure payment routing rules
Node 1: (Optional) Traffic routing
The Traffic routing feature on the right panel allows you to direct a portion of your transaction traffic to the smart routing engine to improve payment performance. This feature can be used for A/B testing experiments.
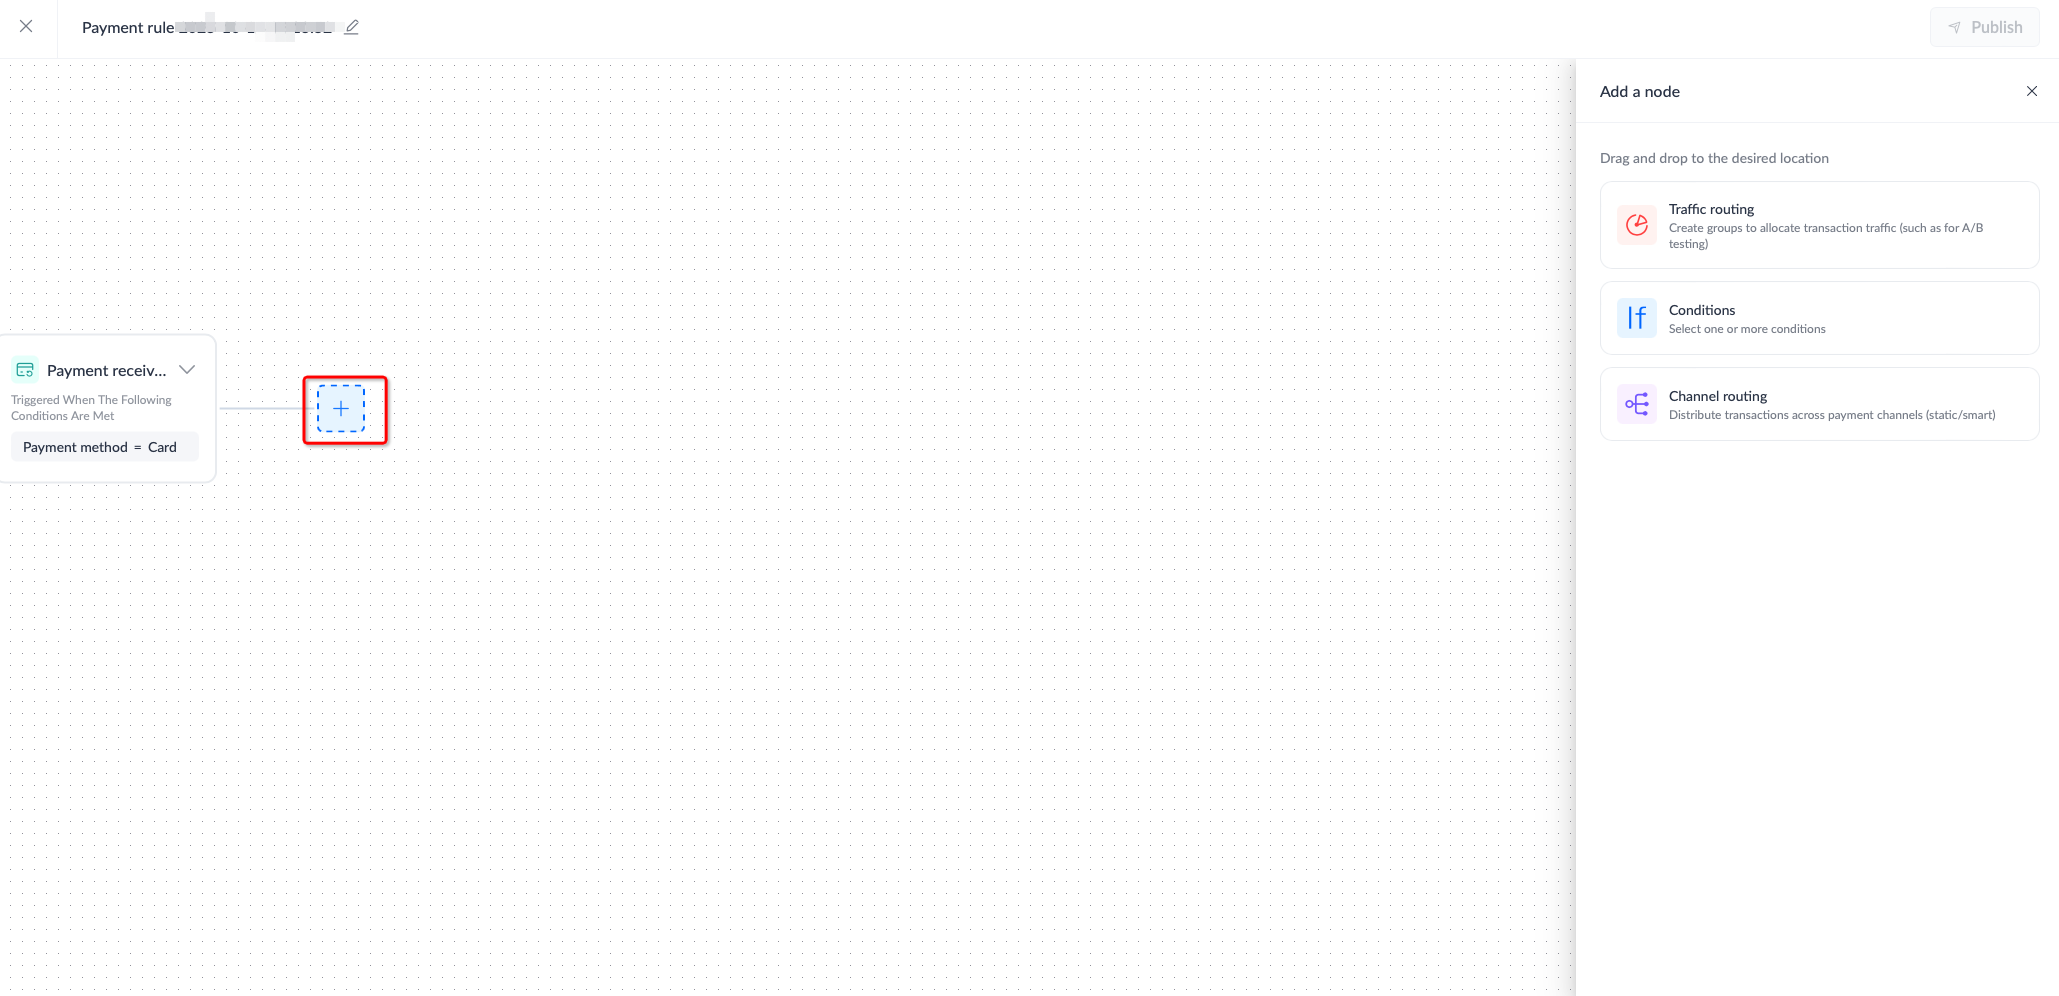
- Click the add
 icon, and the Add a node panel on the right opens.
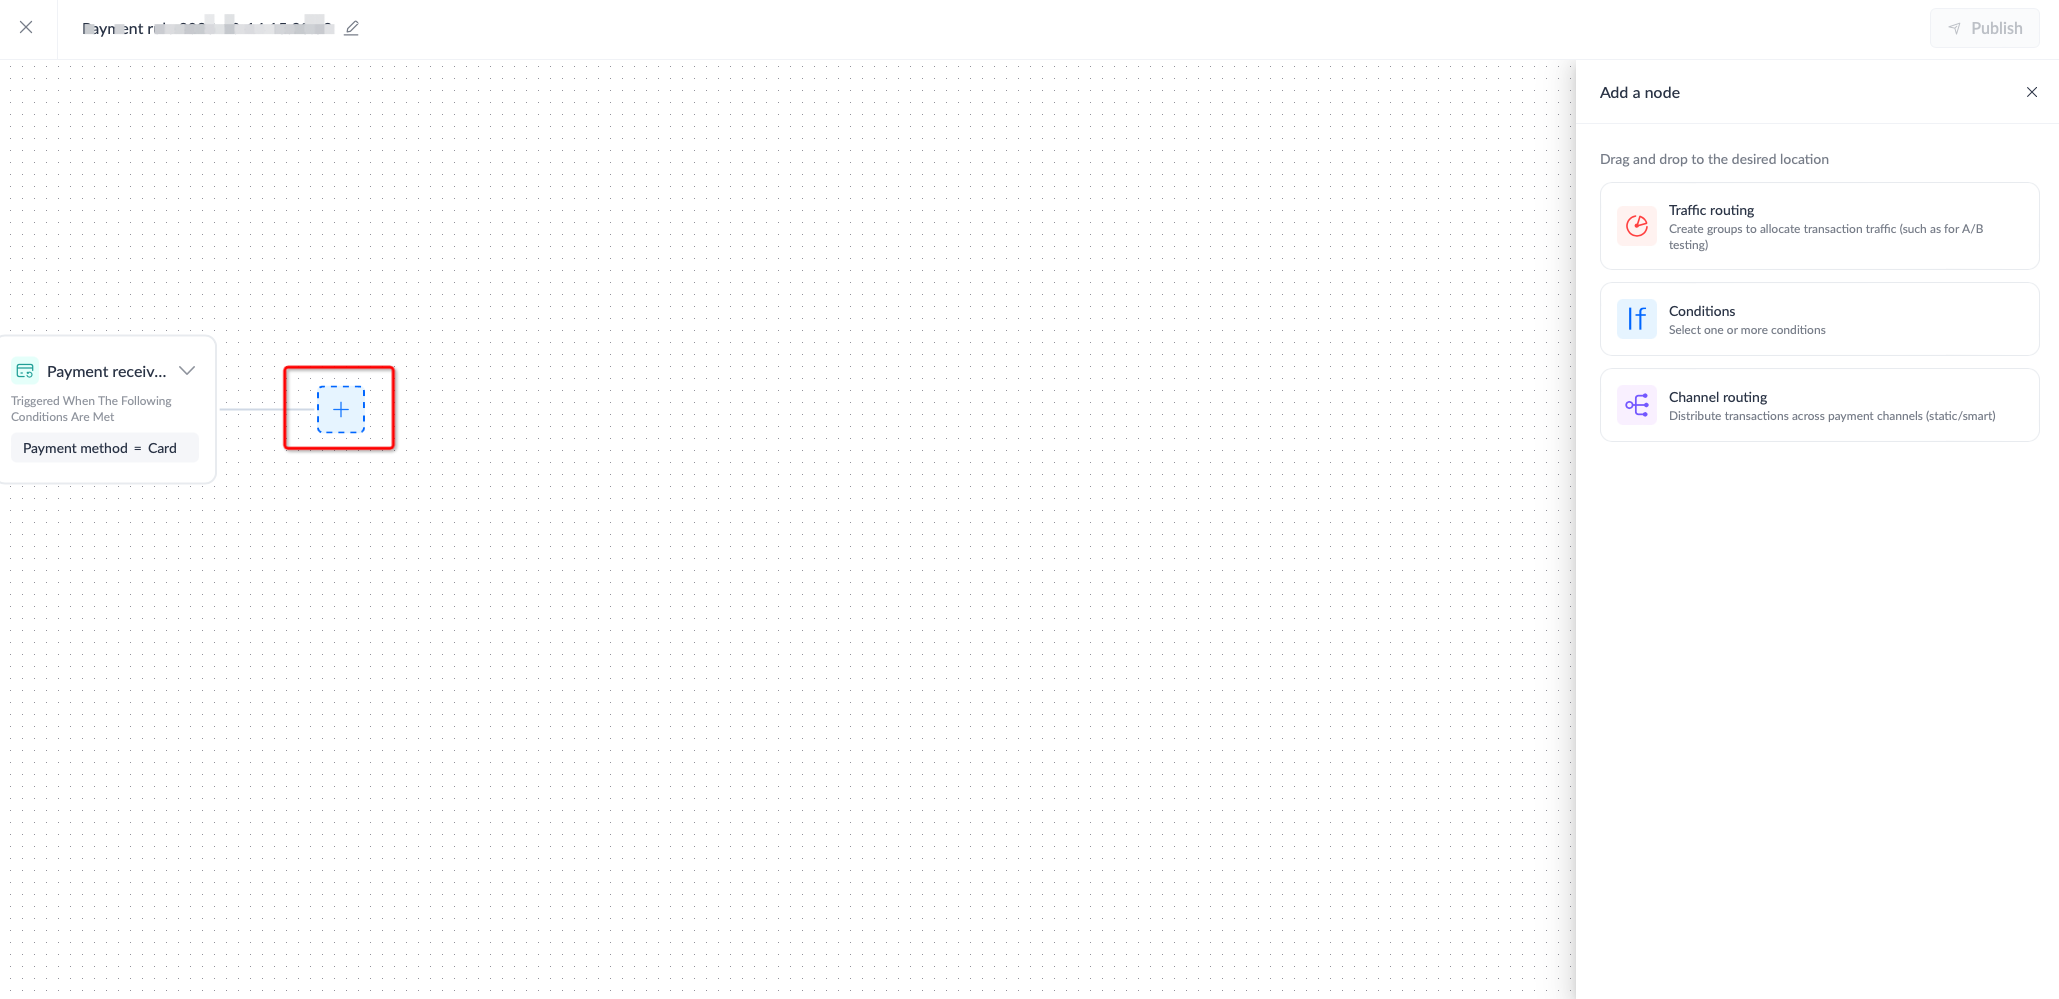
- Click and drag the Traffic routing module onto the canvas on the left to specify the allocation of transaction traffic.
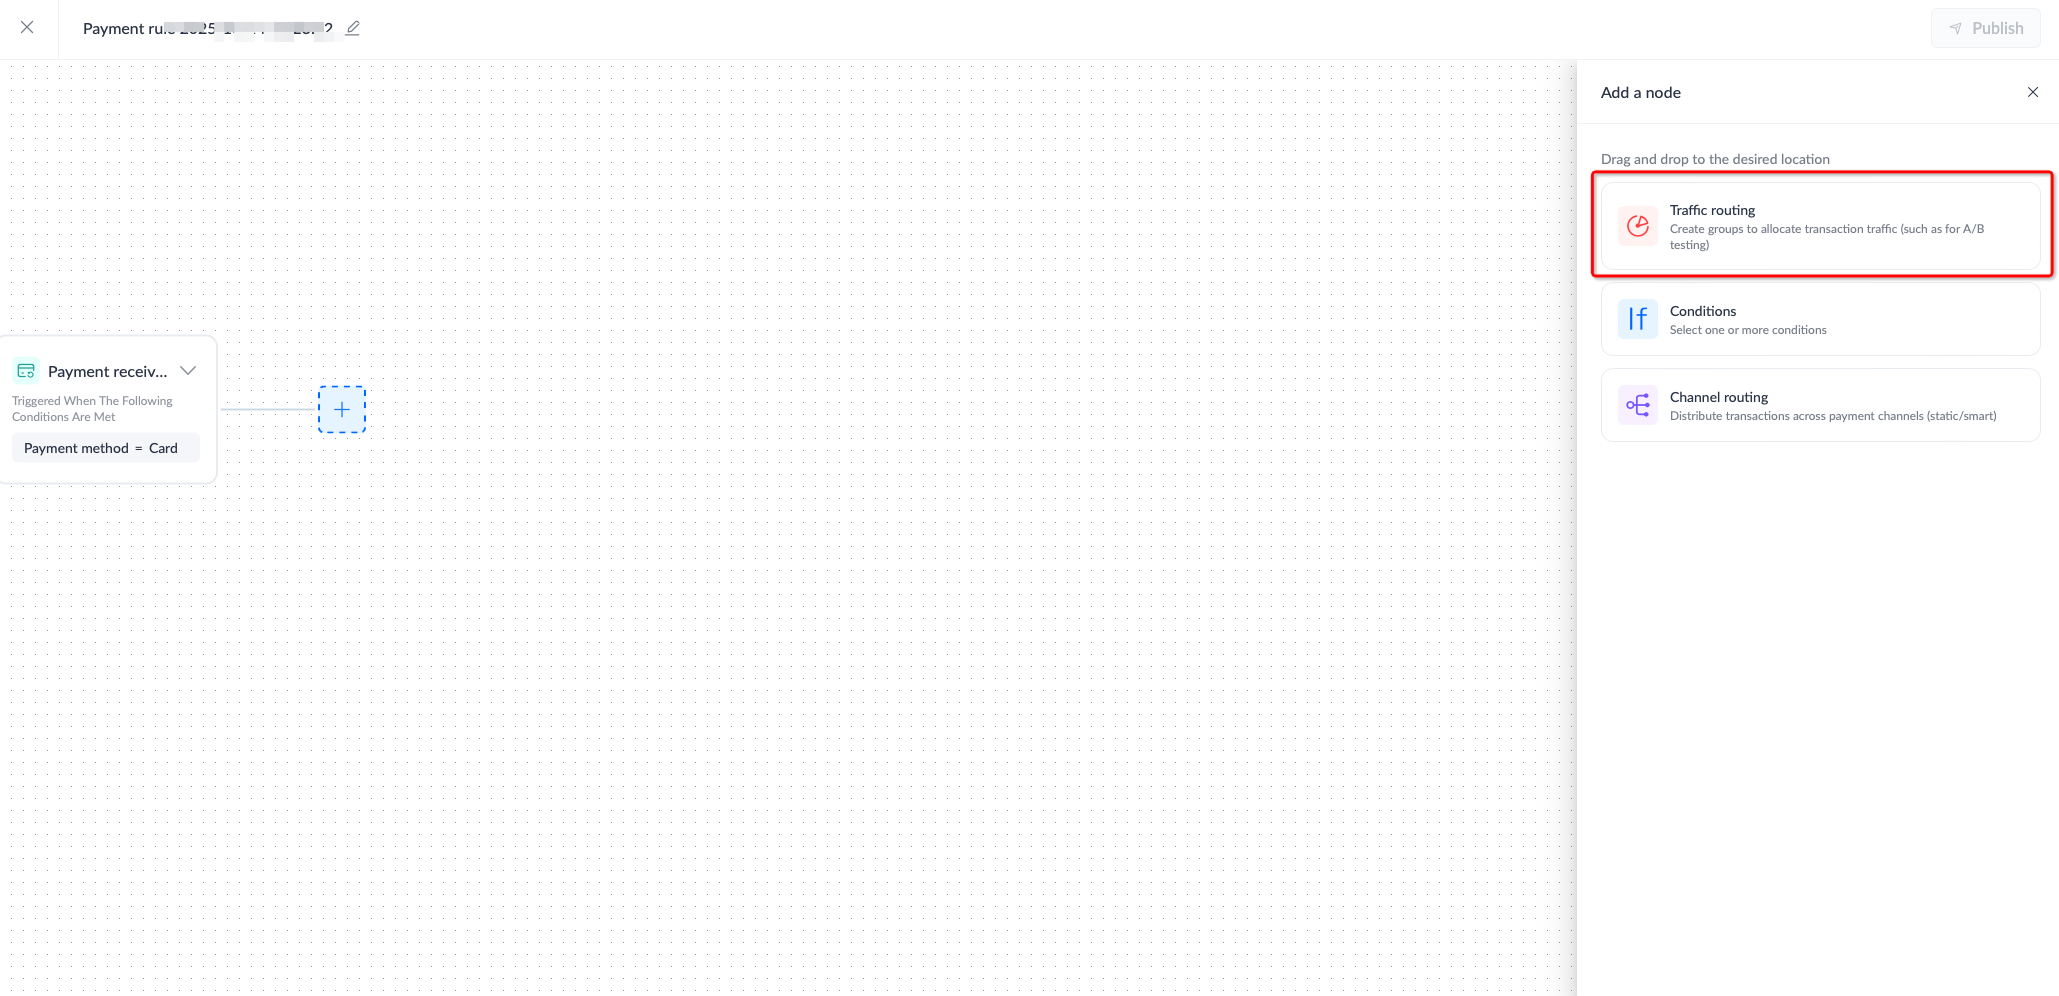
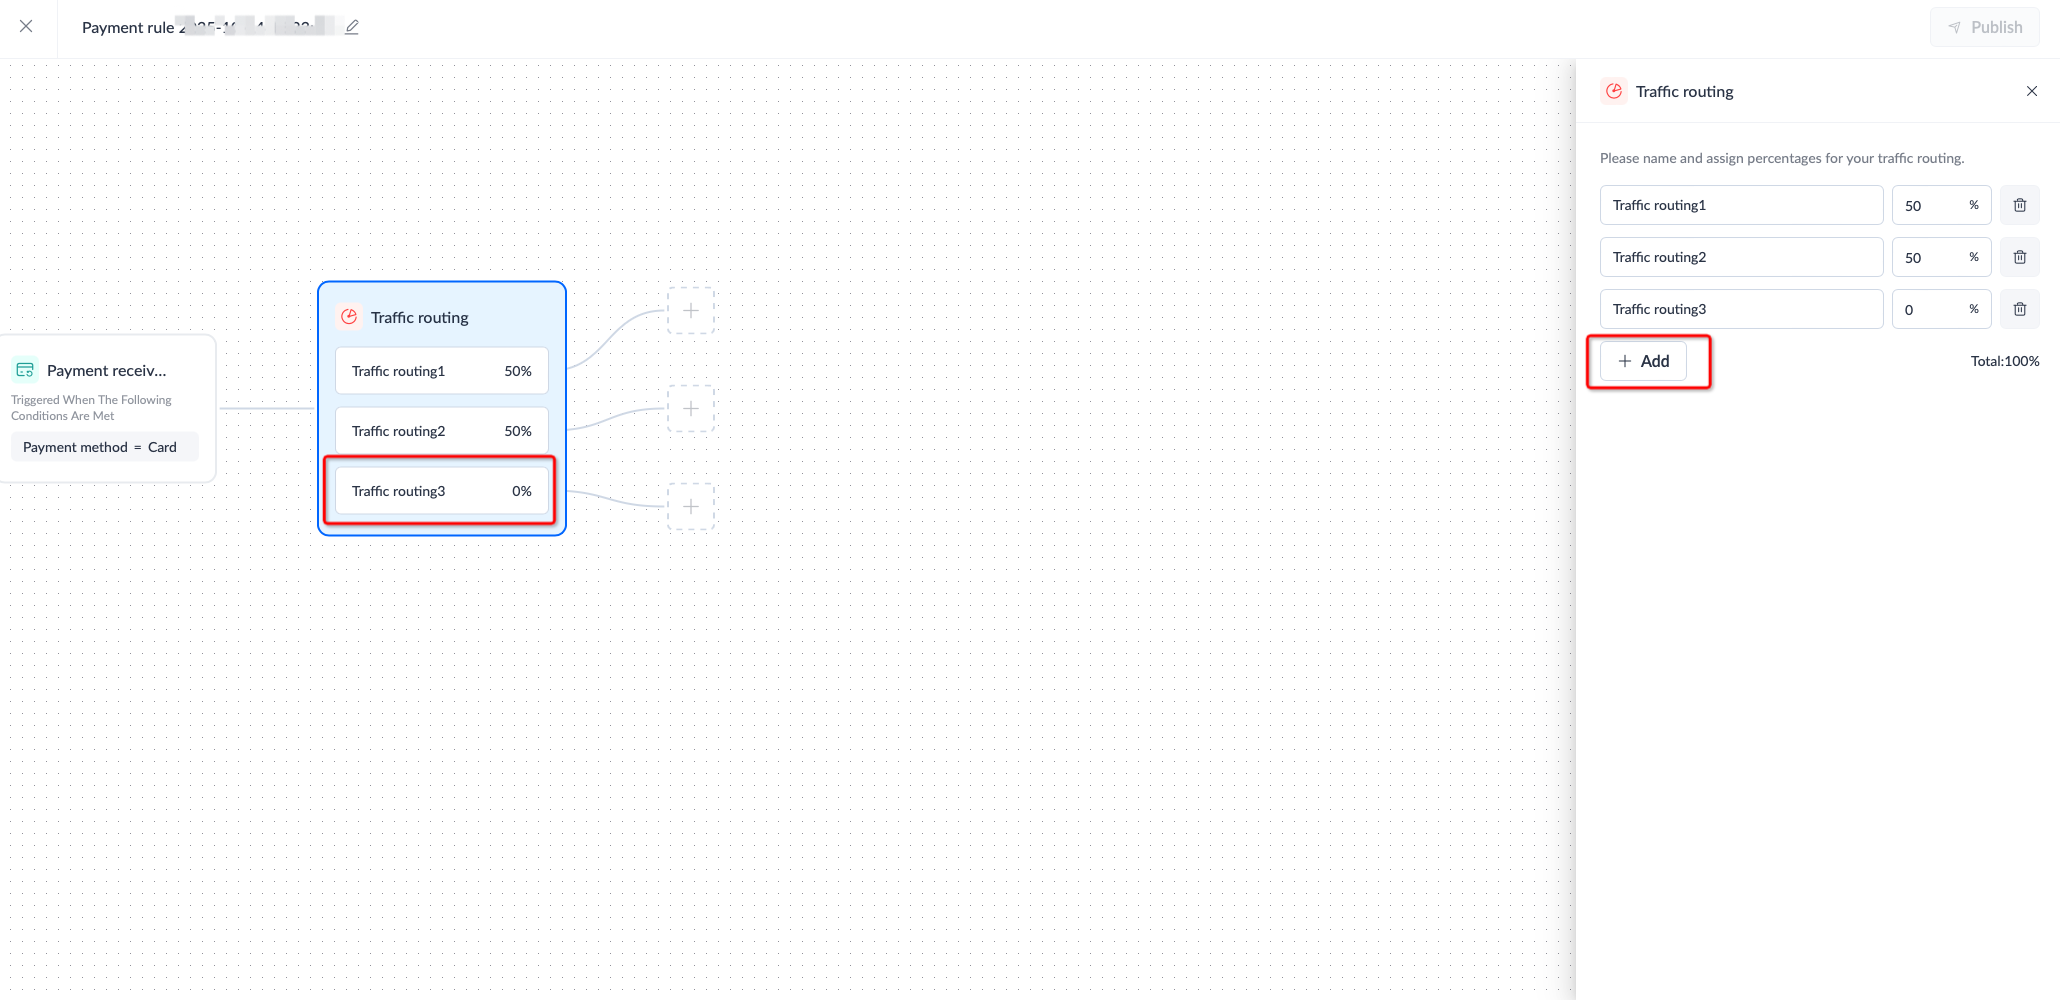
- After clicking the Traffic routing box in the canvas, the Traffic routing editing panel on the right opens. Perform any of the following actions according to your business needs:
- Rename or assign percentages to you traffic routing configurations:

- Click Add to create a new traffic branch. Note that the total allocation percentage of traffic must result to a total of 100%.

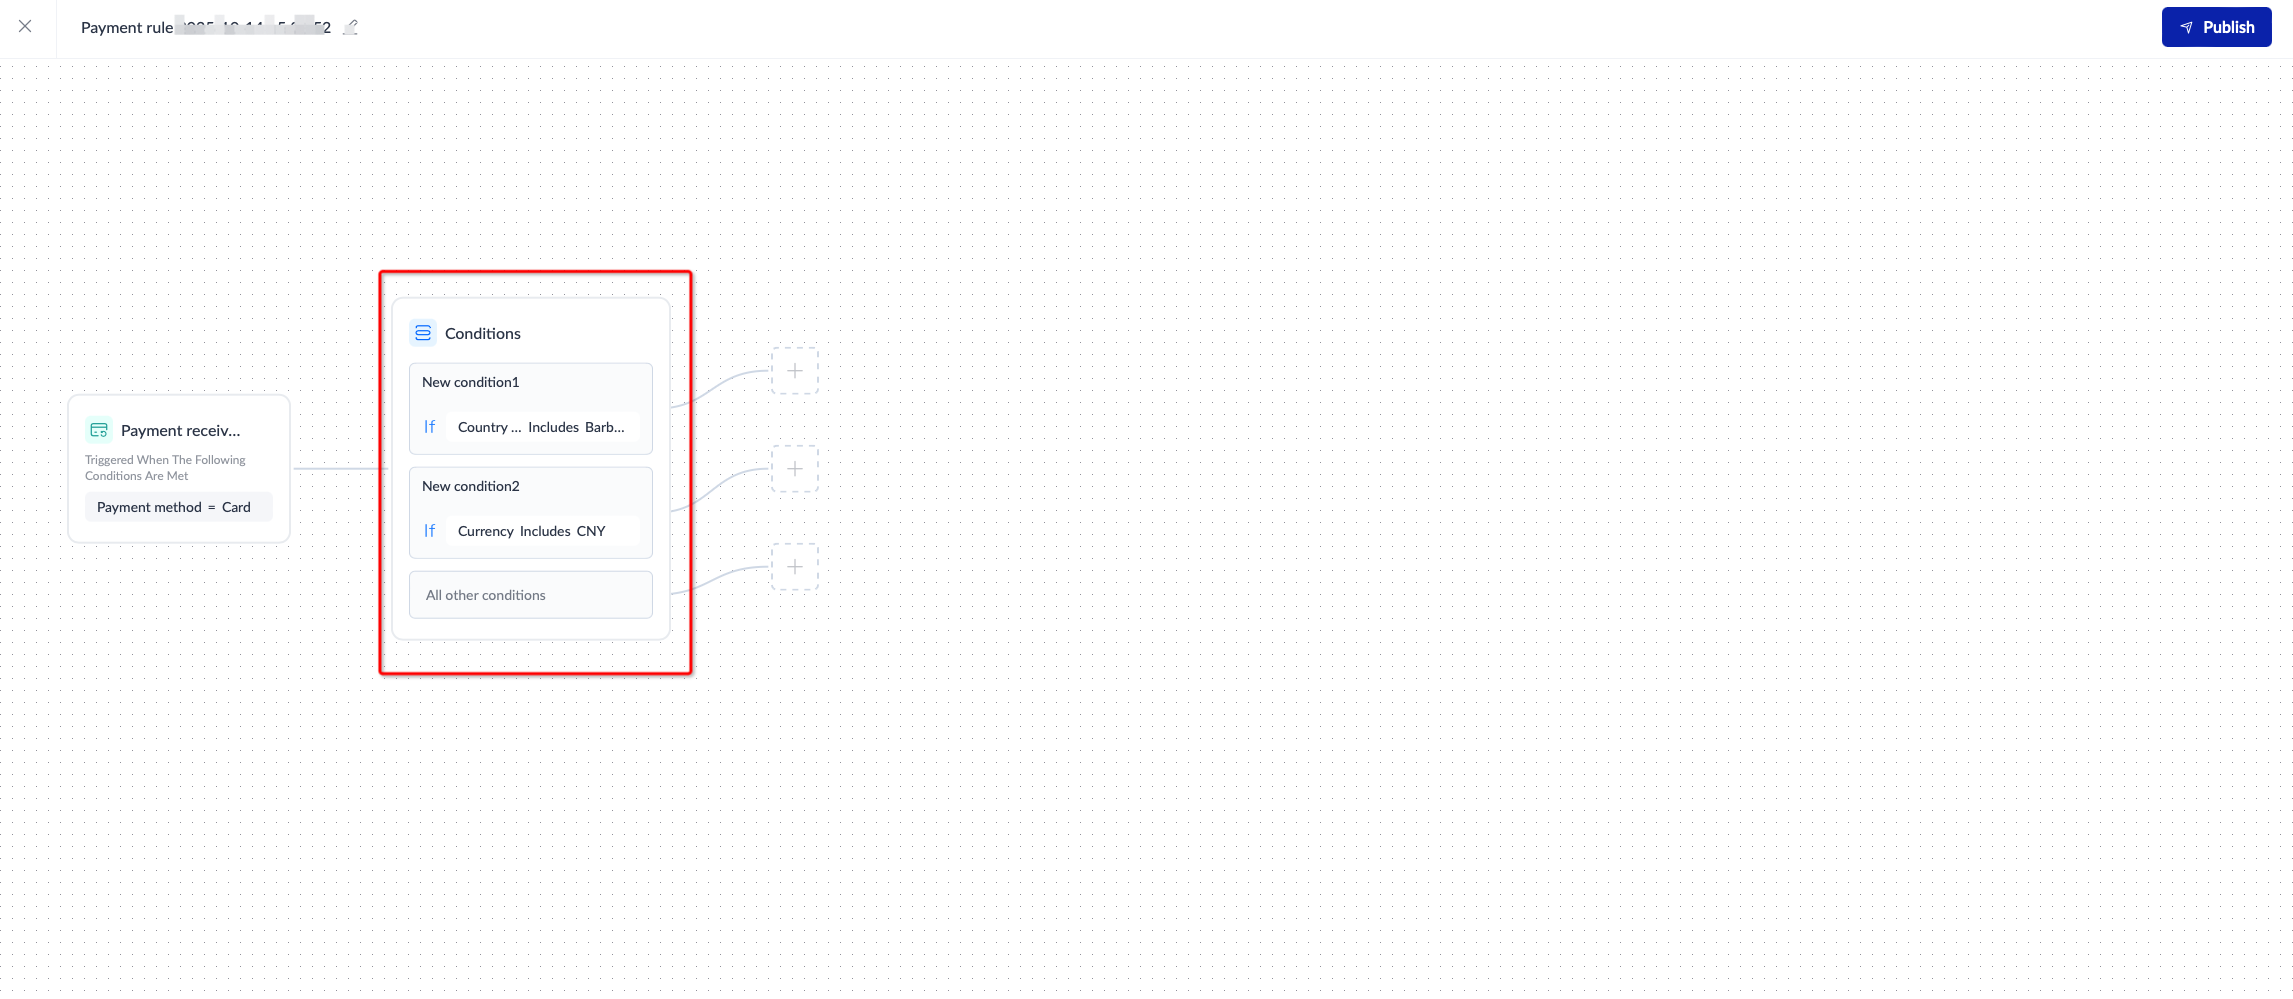
Node 2: (Optional) Set conditions
Depending on your business needs, set various transaction characteristics or conditions (e.g., currency, card brand etc.). Only transactions that meet these specified conditions will continue to execute your preset operations.
1. Create conditions
- Click the add
 icon, and the Add a node editing panel on the right opens.
- Click and drag the Conditions module onto the canvas on the left to configure one or multiple conditions.

2. Configure conditions
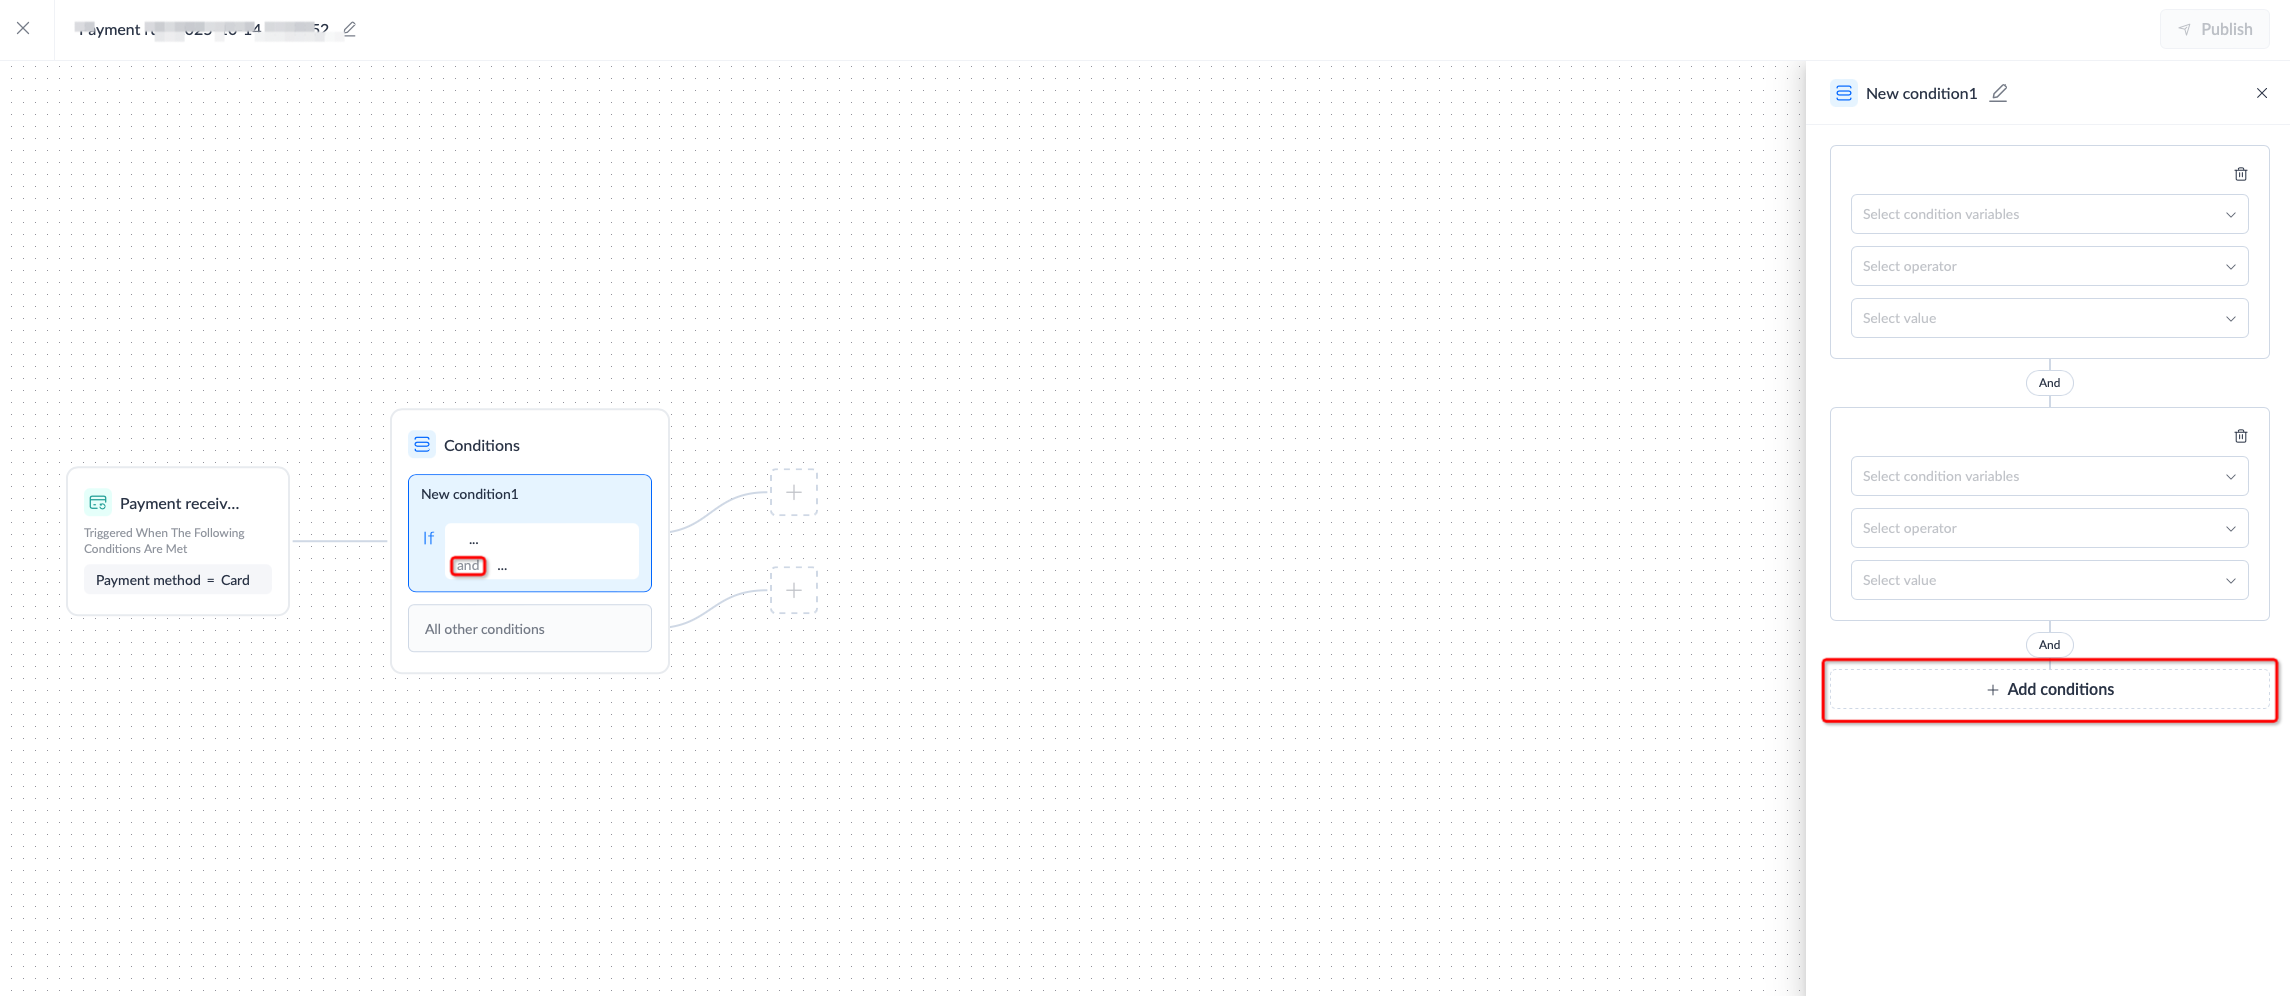
On the canvas, click to select the New condition1 box, and the corresponding editing panel opens. Perform any of the following actions to configure the condition:
- Configure the New condition1.
- Click the edit icon
 to rename New condition1.
- If you wish to add more conditions, click Add conditions.

3. (Optional) Set multiple conditions
Click Add condition  to add multiple conditions.

4. (Optional) Adjust the priority of conditions
Note: After configuring the channel routing for each condition, if you adjust the priority of the conditions at this step, the channel routing settings for each condition will be updated automatically, and no additional action is required.
When there are multiple conditions, the one at the top has the highest priority. If you need to adjust the priority of the conditions, use one of the following methods to ensure that the conditions are in non-editing mode:
- After editing the condition, click the close button
 in the top-right corner of the conditions editing panel to exit edit mode.
- After editing the condition, click anywhere on the canvas to save the edits. Once saved, the Conditions box will be displayed with a white background instead of a blue background.

You can then click Sort to adjust the priority of the conditions.
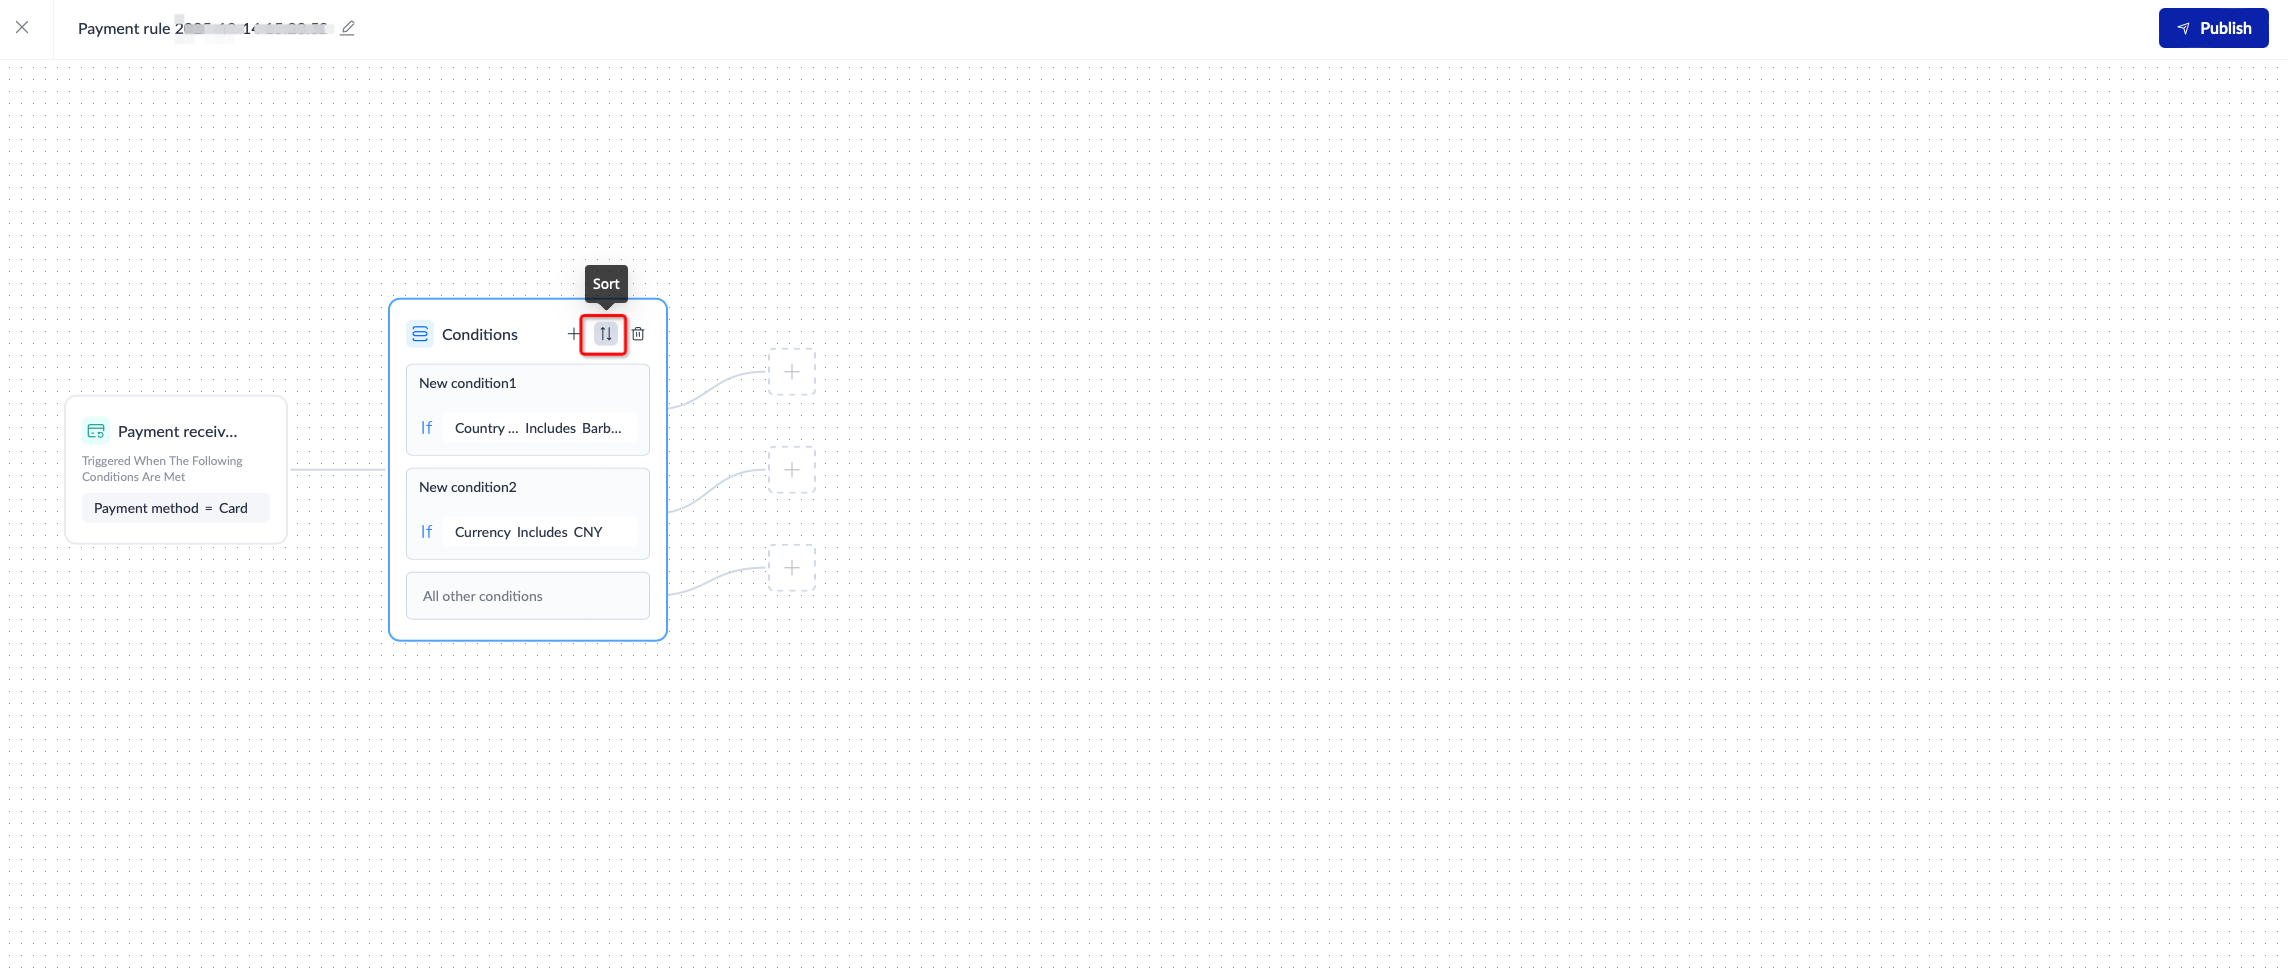
Click the  icon and drag the condition to the desired position to adjust its priority. Click the
  icon to save.

Node 3: Configure payment routing rules
APO’s payment routing feature is a customizable solution that allocates payment traffic precisely according to your business needs. With smart routing, you can not only significantly boost transaction success rates (by an average of 2–4%) but also effectively optimize payment costs, creating greater value for your business. Following the steps below to configure payment routing rules:
1. Create payment routing rules
Click the add icon  to select the Channel routing module in the Add a node panel on the right, and then drag it to the canvas on the left to configure.
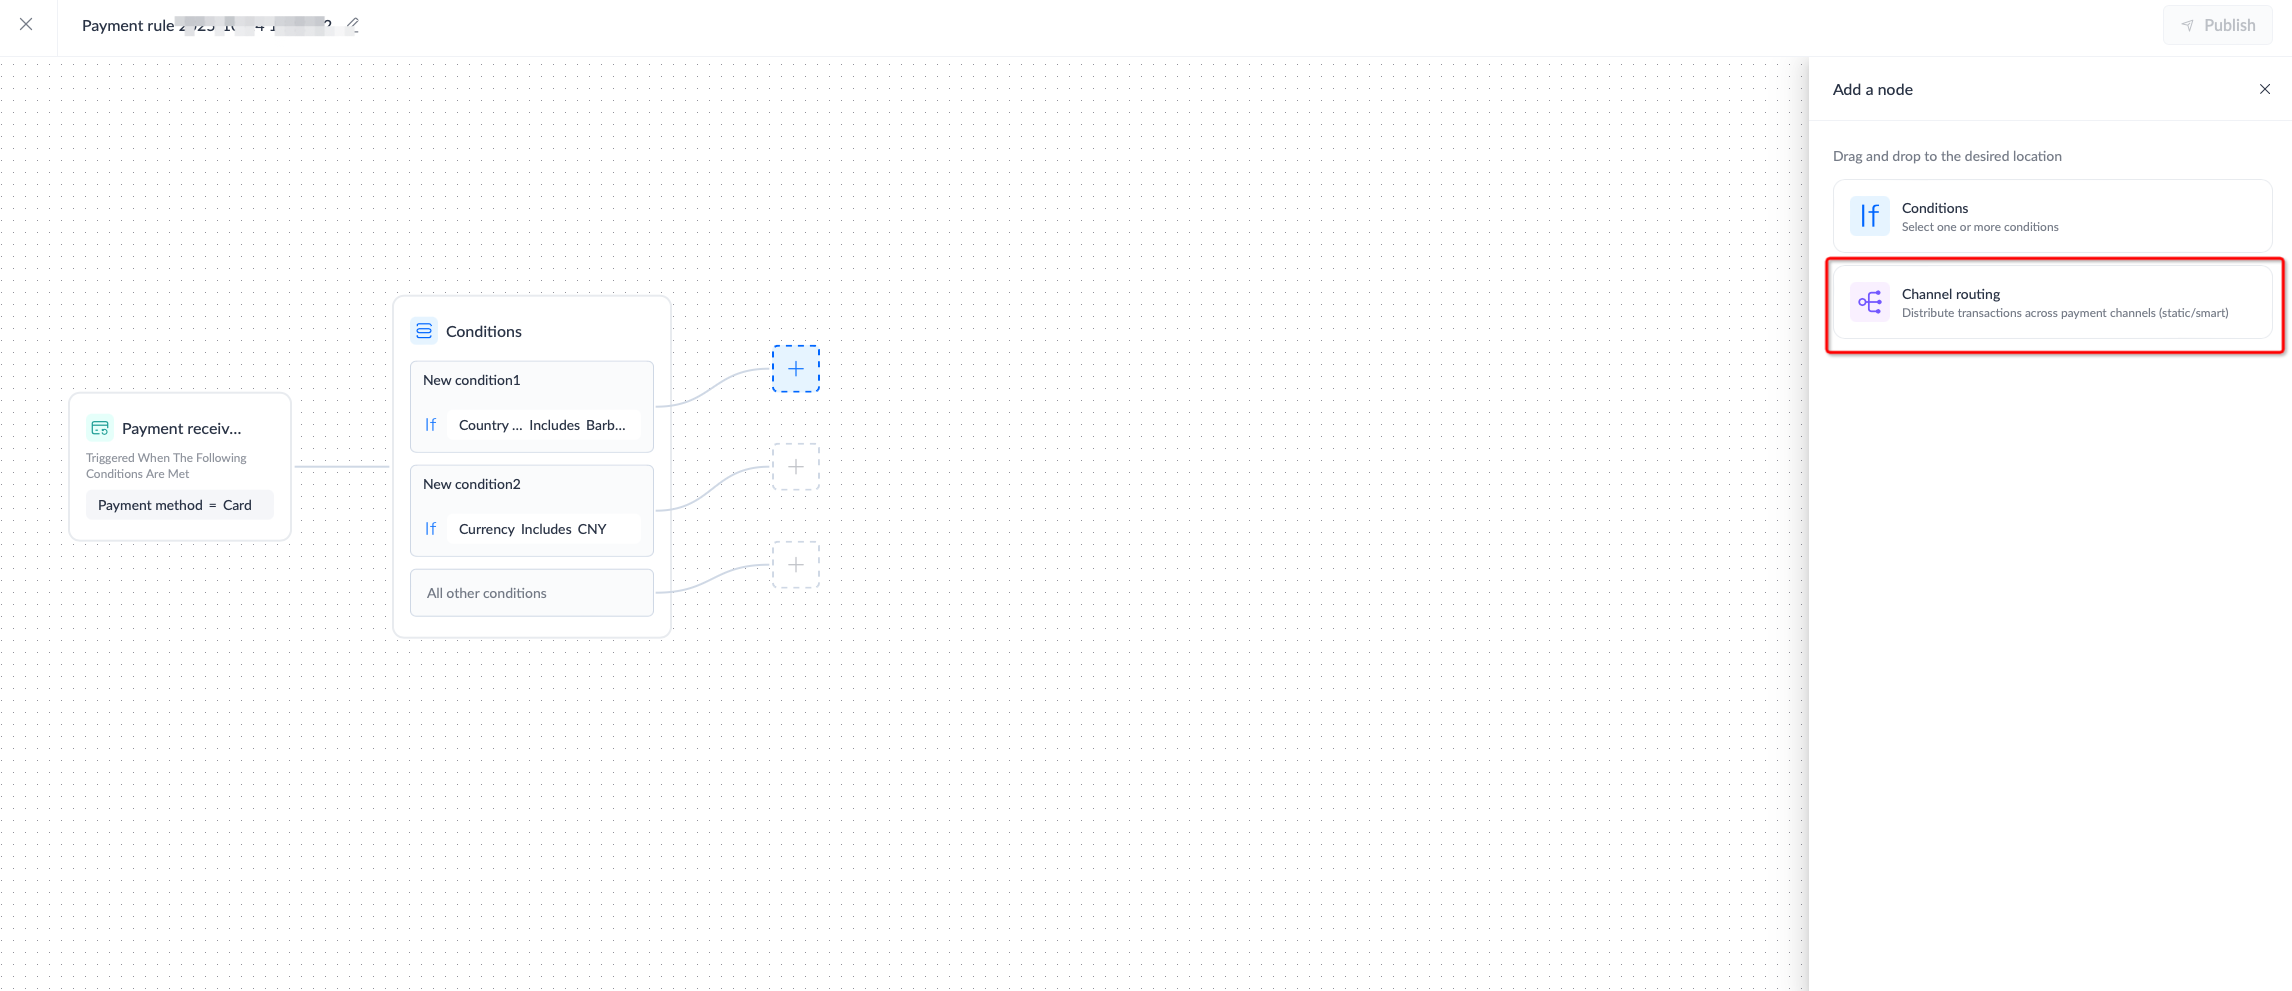
2. Configure payment routing percentages
Click the Channel routing box on the canvas to configure it in the editing panel on the right. Use the toggle button to enable either Static routing, Intelligent routing, or both.
- Enable Intelligent routing only: Enable the Intelligent routing toggle in the editing panel on the right, where the routing percentage is by default set to 100%.
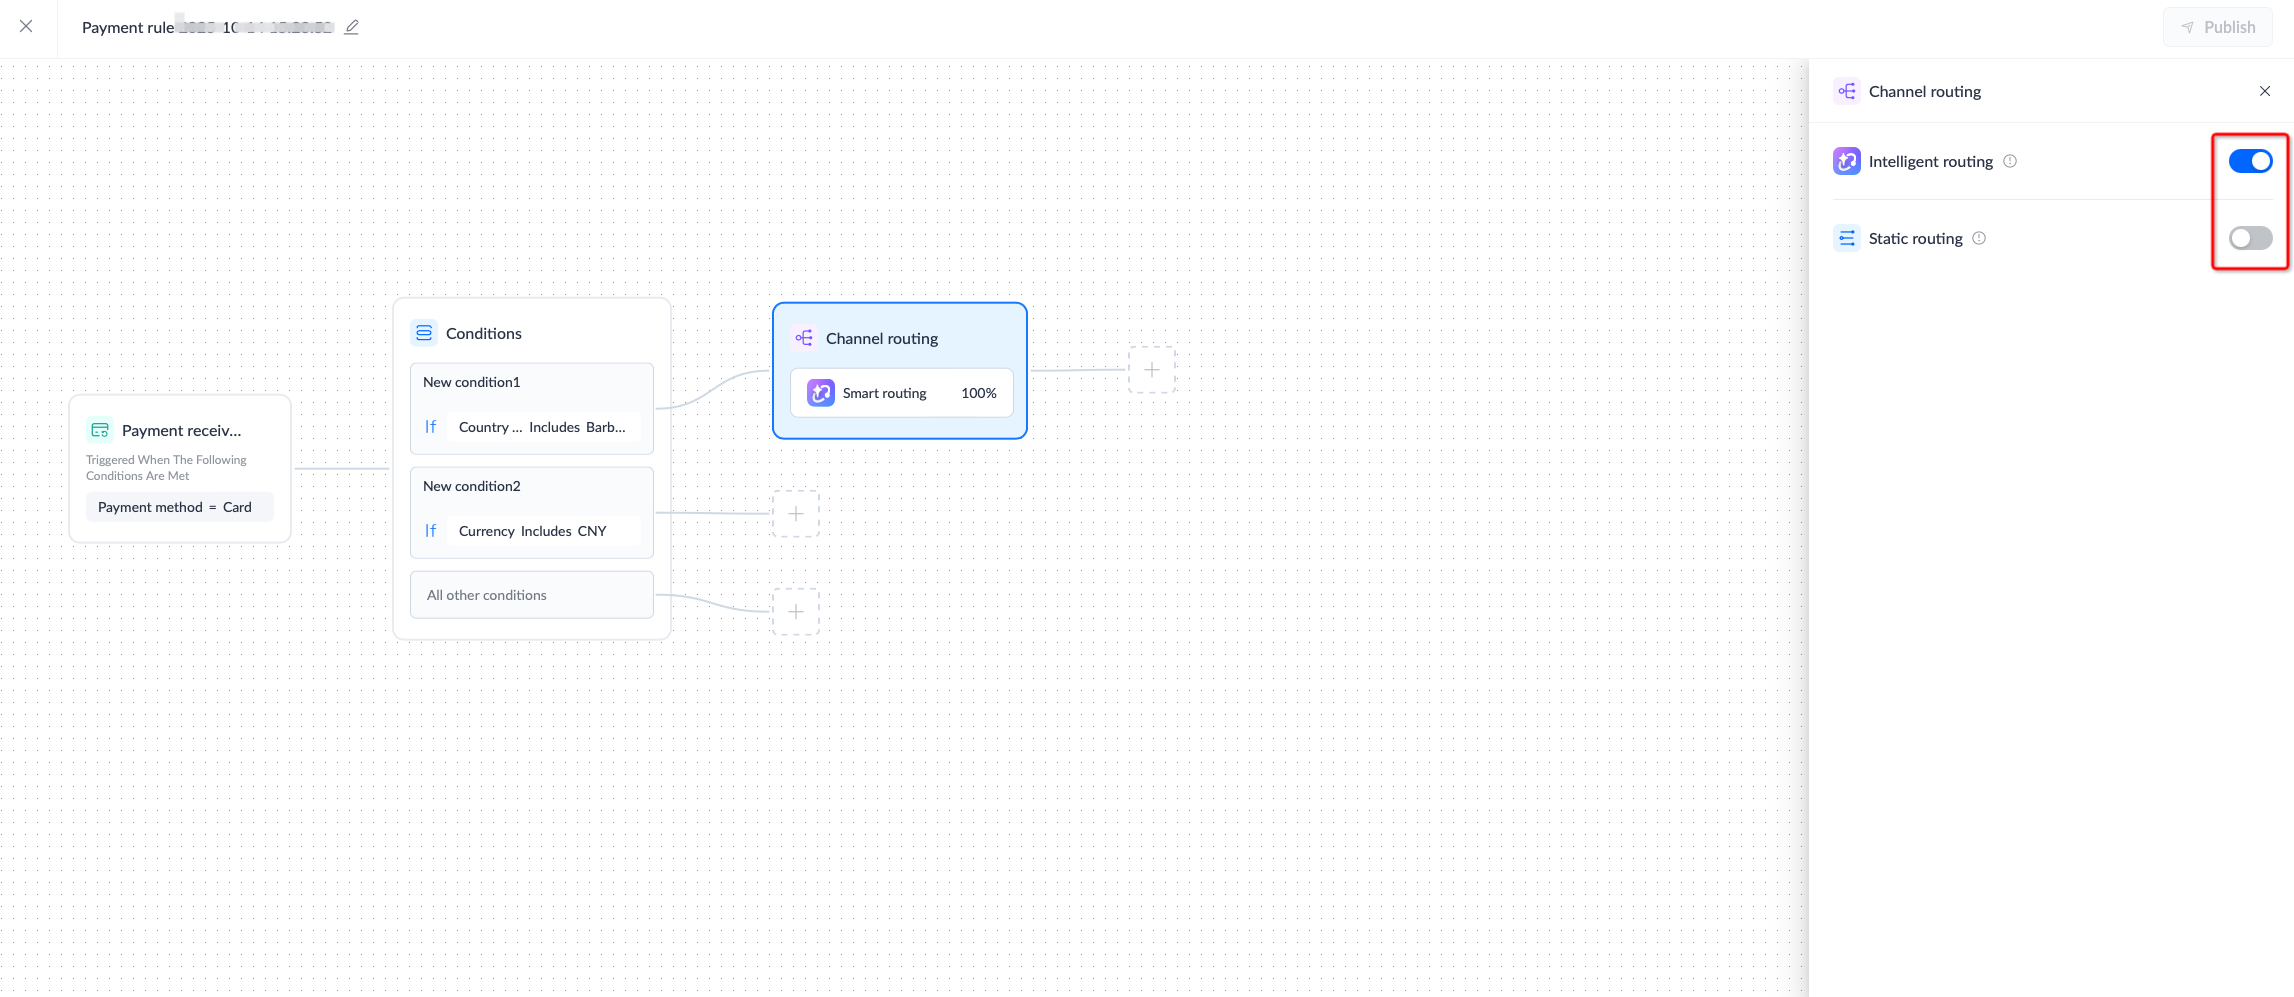
- Enable Static routing only: Enable the Static routing toggle in the editing panel on the right, and click Add to add payment method providers. Enter the allocation percentage for each provider in the corresponding input boxes. Ensure that the total of all channel routing percentages equals 100%.


- To enable both Intelligent routing and Static routing: Enable both the Intelligent routing and Static routing toggles in the right editing panel, and enter percentages in the boxes to allocate traffic to each payment method provider. Ensure that the total of all channel routing percentages equals 100%.

3. Advanced settings
If you have multiple merchant IDs (MIDs) enabled with an acquirer, you can specify the MID to direct transactions to the target pathway. You can check the Route to specified merchant account check box to route transactions to one or more designated merchant accounts you have with the acquirer. If this option is not checked, transactions will be randomly routed to all available merchant accounts you have with the acquirer.

Step 3: Publish the payment operation rule
When editing a workflow, the system will automatically save your workflow as a draft, so you can easily return to continue editing at any time. Once you're ready, click Publish to publish your payment operation rules. The rules will take effect immediately upon publication.
Note: if there are incomplete nodes, be sure to complete them before publishing.

Manage payment operation rules
On the Orchestration page, you can use the Published, Unpublished, or All filter to narrow down the list of all payment operation rules you have edited. Click the more icon  to view details, activate, or delete the selected payment operation rule.

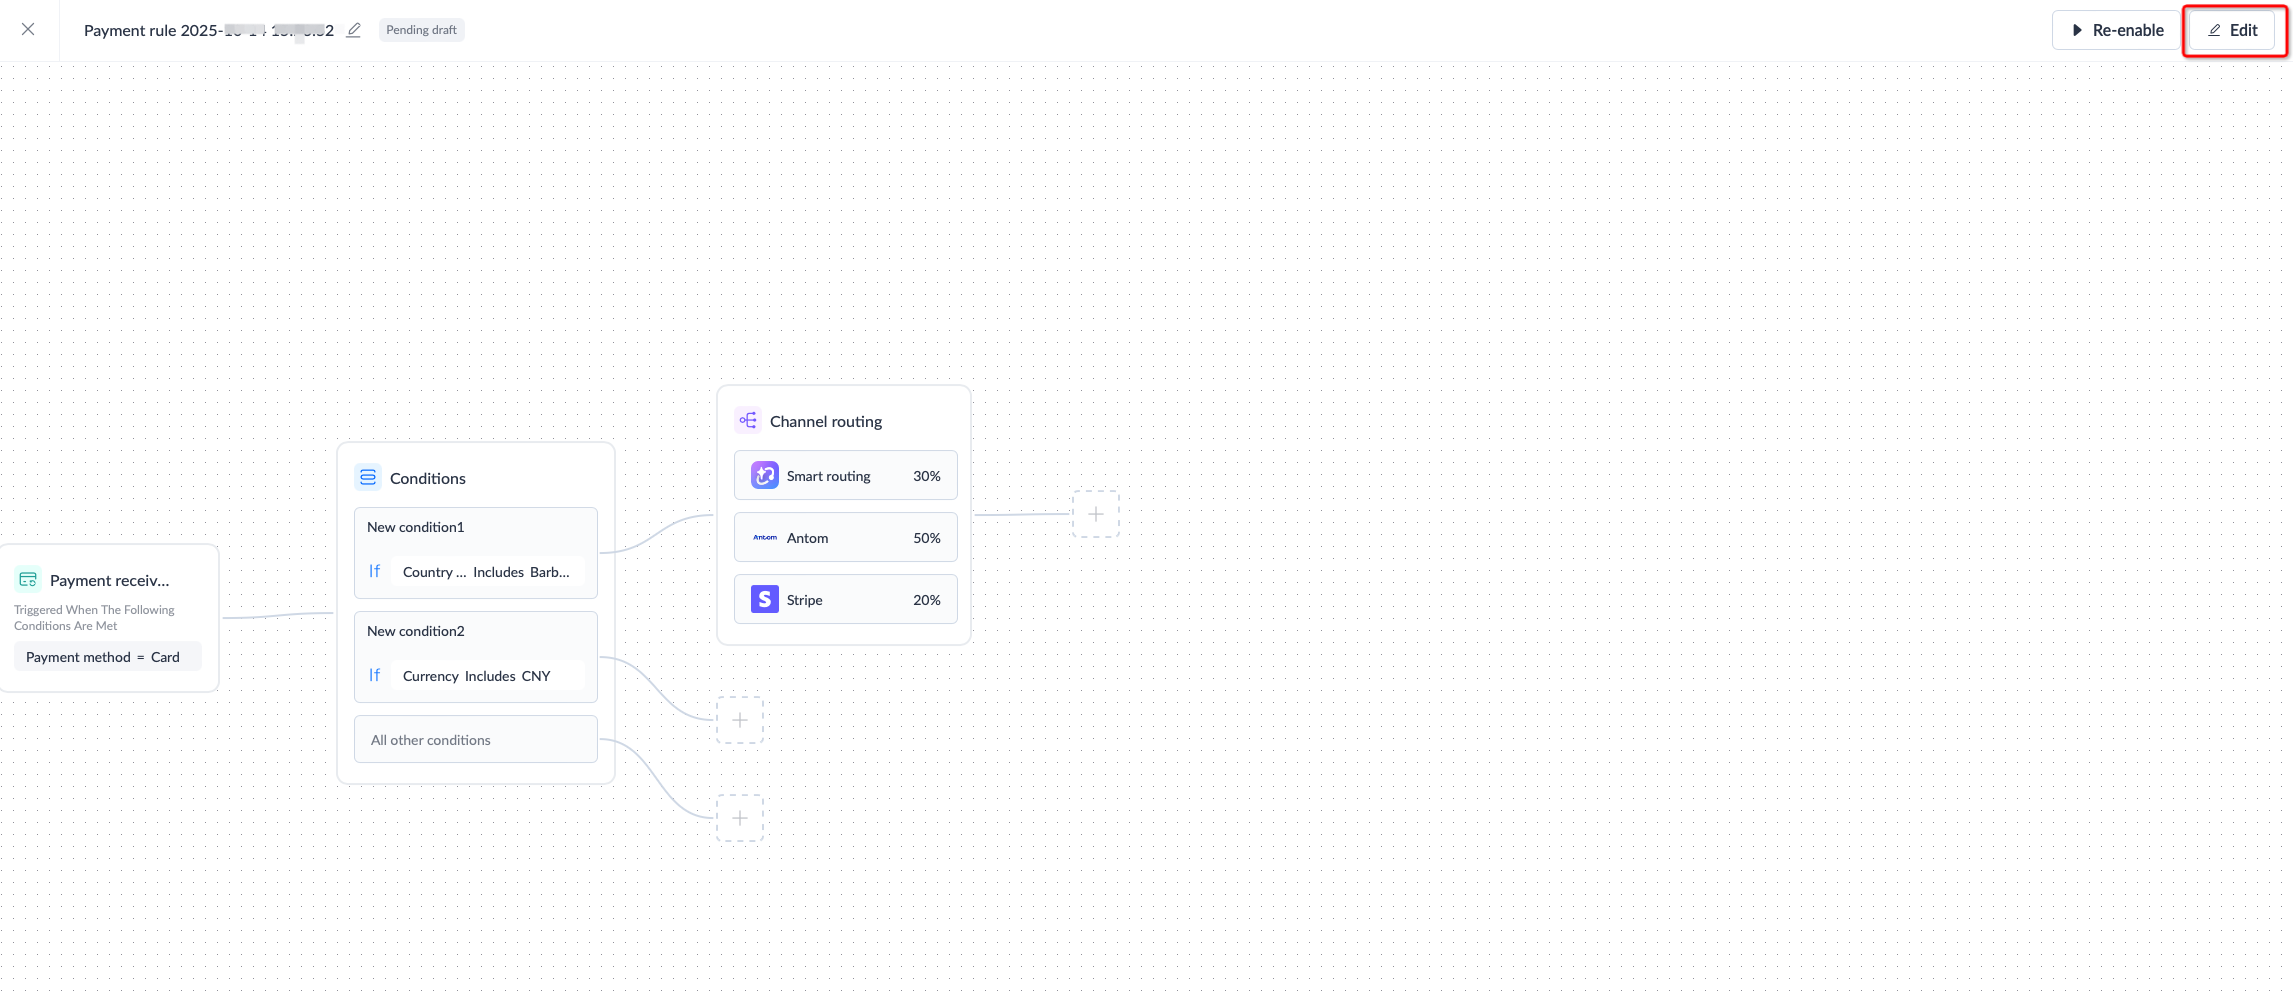
If you wish to continue editing a payment operation rule that was previously unfinished, click View details to enter the editor, and click the Edit button in the top-right corner to proceed.
